Lollipop Swirl Antique Quilt Top

I recently shared this sweet quilt top for #oldepatchartday on Instagram.
I had a few questions re curved piecing so I have written a blog post I named 'Lollipop Swirl Piecing Curves Tips and Tricks'.
This should help when piecing these tricky ol' curves.
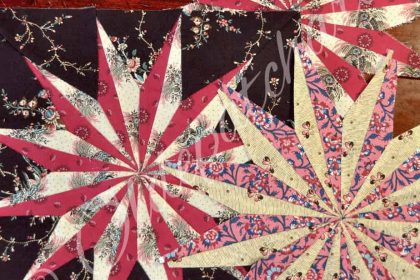
Here's a photo of the antique top which I have since drafted and named 'Lollipop Swirl'.
You will find the link to 'Lollipop Swirl Quilt' under Free PDF Patterns.
Piecing curves whilst daunting at first, is very doable using these few tricks I have learned along the way.
Embrace your curves!
Caves vs Hills…..Clip Those Caves
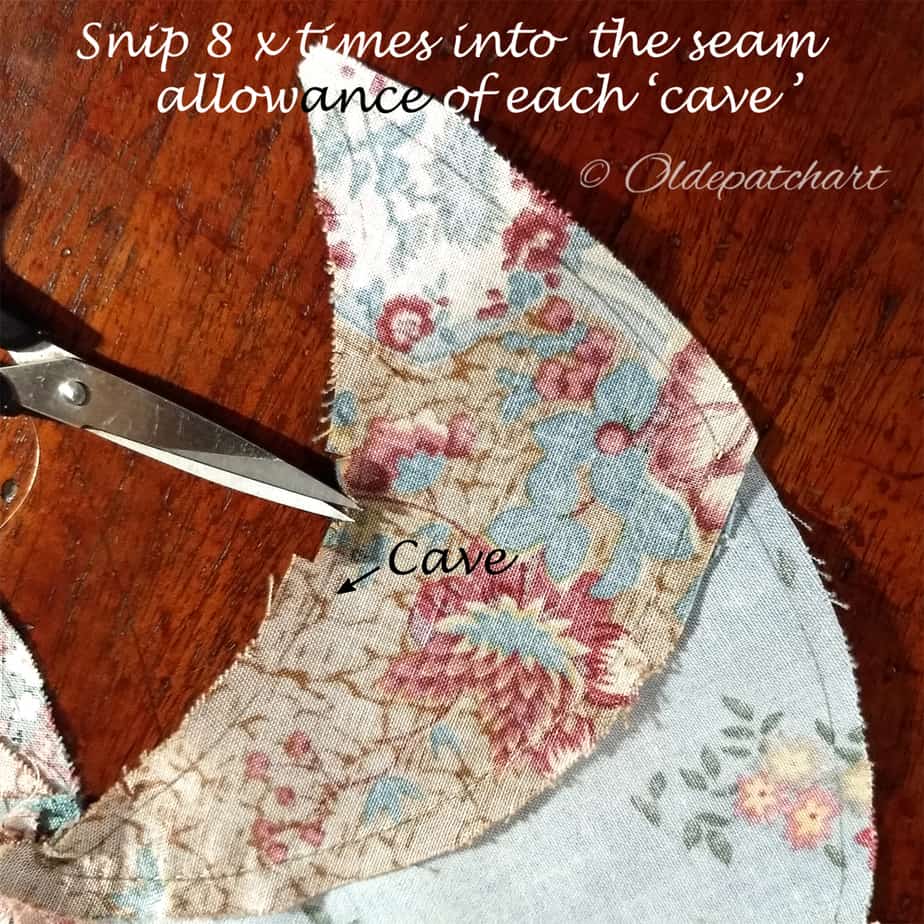
I prefer to think about curves as being either Caves or Hills.
I find that much easier to remember than concave & convex curves.
Cave = Concave curve, that's fairly easy to work out and remember....it's the innie curve.....yup just like a cave!
Hill = Convex curve or the hump if you like.......the outie curve.
I have marked these on my diagrams to make it easier to follow along with what I am meaning.
Into the seam allowance of each segment clip your 'cave'.
I do this in approximately 8 places along that seam line, always taking care to stop a smidge short of my stitching line.
Match Your Centres and Pin
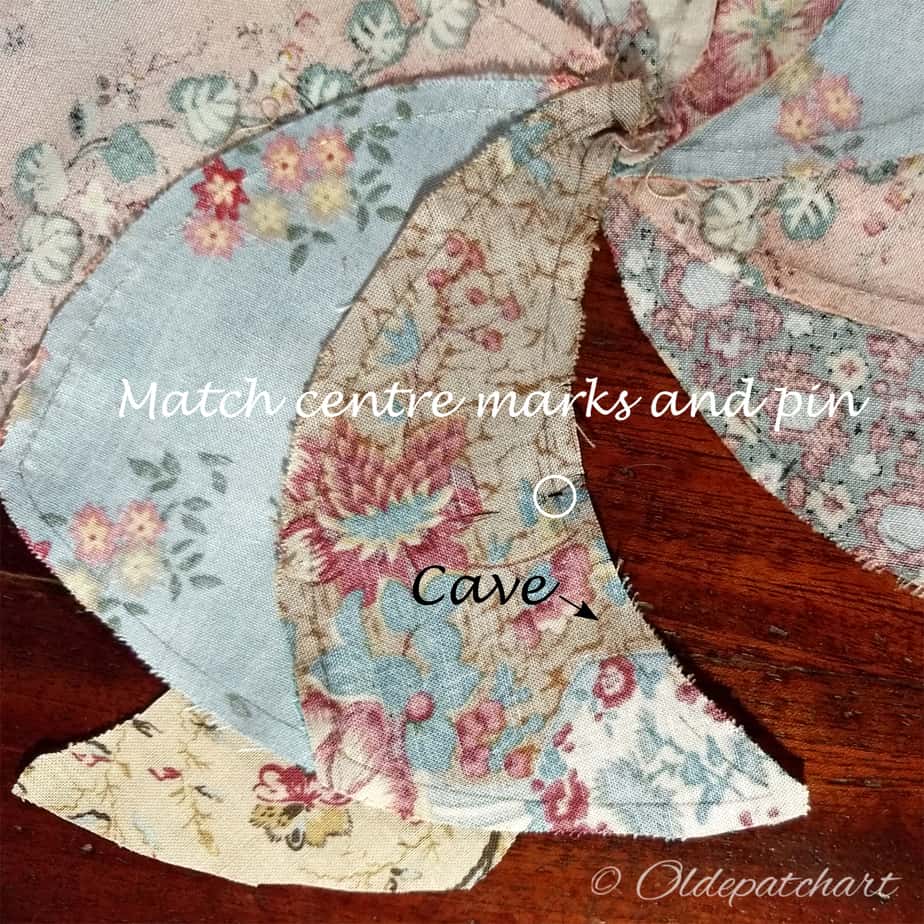
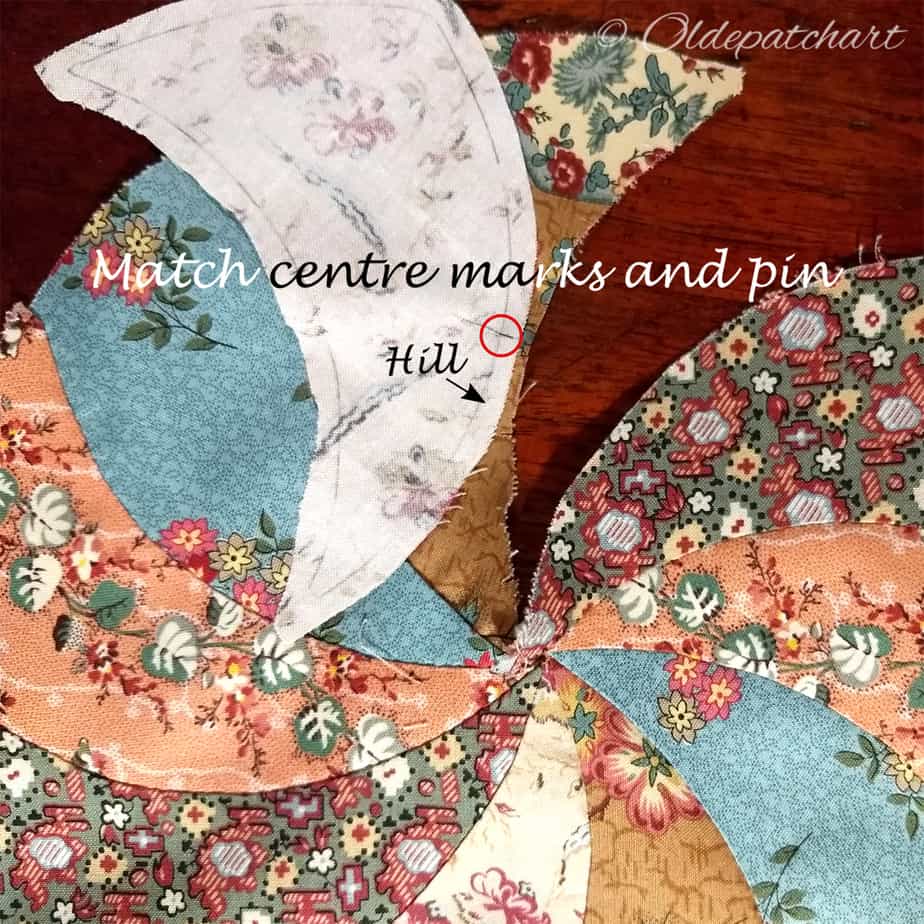
Make sure you've transferred the centre marks onto each segment from pattern template A.
With the first segment face up on the table, place the next segment face down: with the cave on top of the hill, right sides together. Match up those centre marks and pin.
I love to use Karen Kay Buckley's Perfect Pins.....as the name suggests: they really are Perfect!
It will look a little odd at first as though this will never work.
Here I have shown the matching and pinning from both sides.....please note you will be stitching with the cave facing uppermost.
Match Start of Seam and Back Stitch
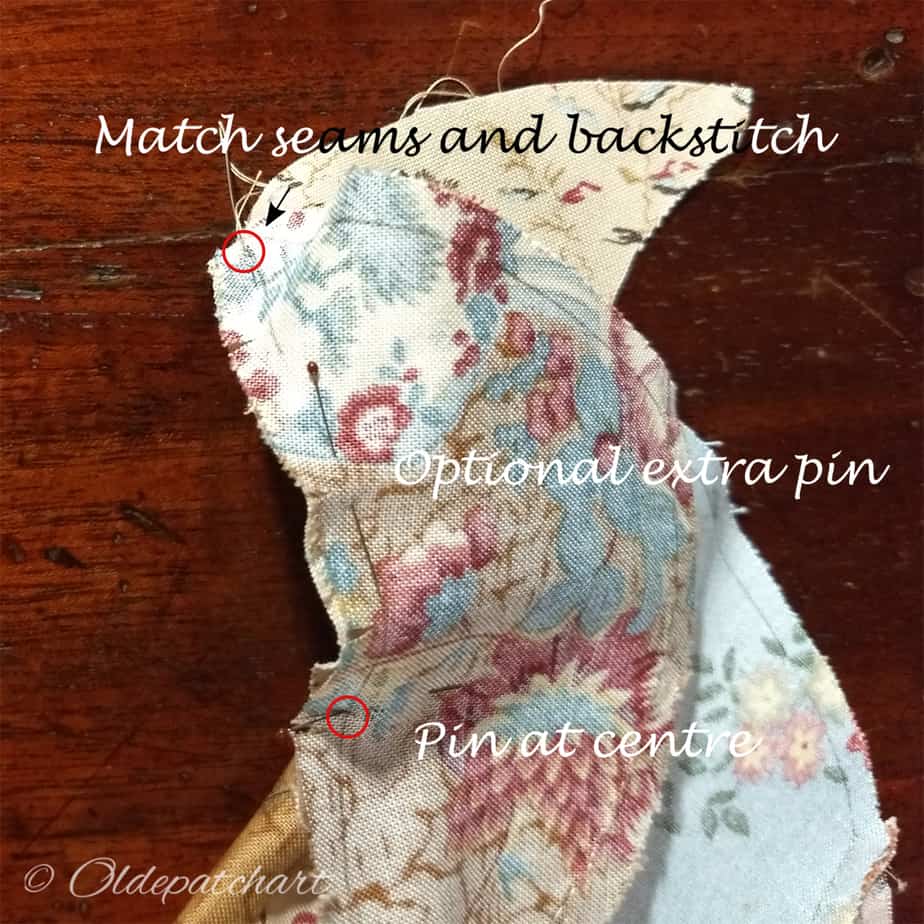
You will start your seam from the outside edge......stitching in towards the centre.
I skip the step of using a pin at the start of my seams, instead using my needle, I go through both start points and anchor with a few back stitches.
It's up to you if you want to put in zillions of extra pins or none.
I have found that by back stitching an anchor at the start of my seam and with that first pin placed at the centre marks, I really don't have a need for additional pins.
Hand Stitch to the Centre Pin
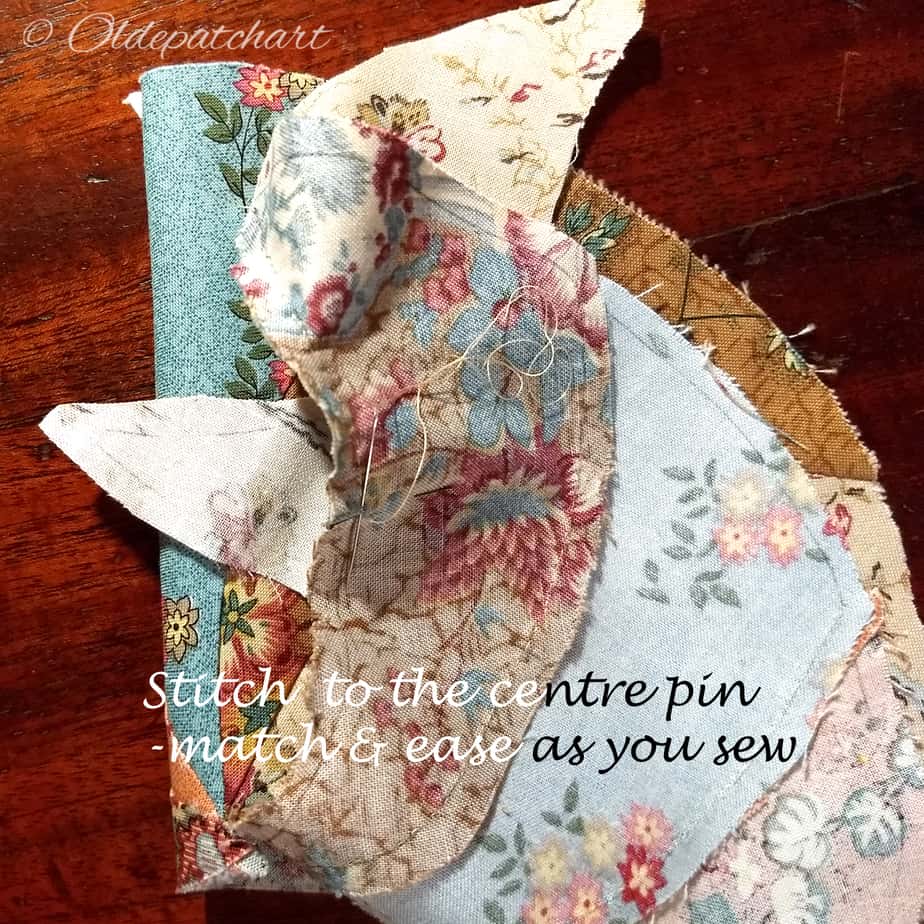
Start hand stitching along your seam, carefully matching and easing your seams together as you go.
This is where the snipped seam allowance will help you.
Just remember to keep checking the reverse of your work to ensure that you are always stitching on the line.
Place a Pin at the End of the Seam and Stitch
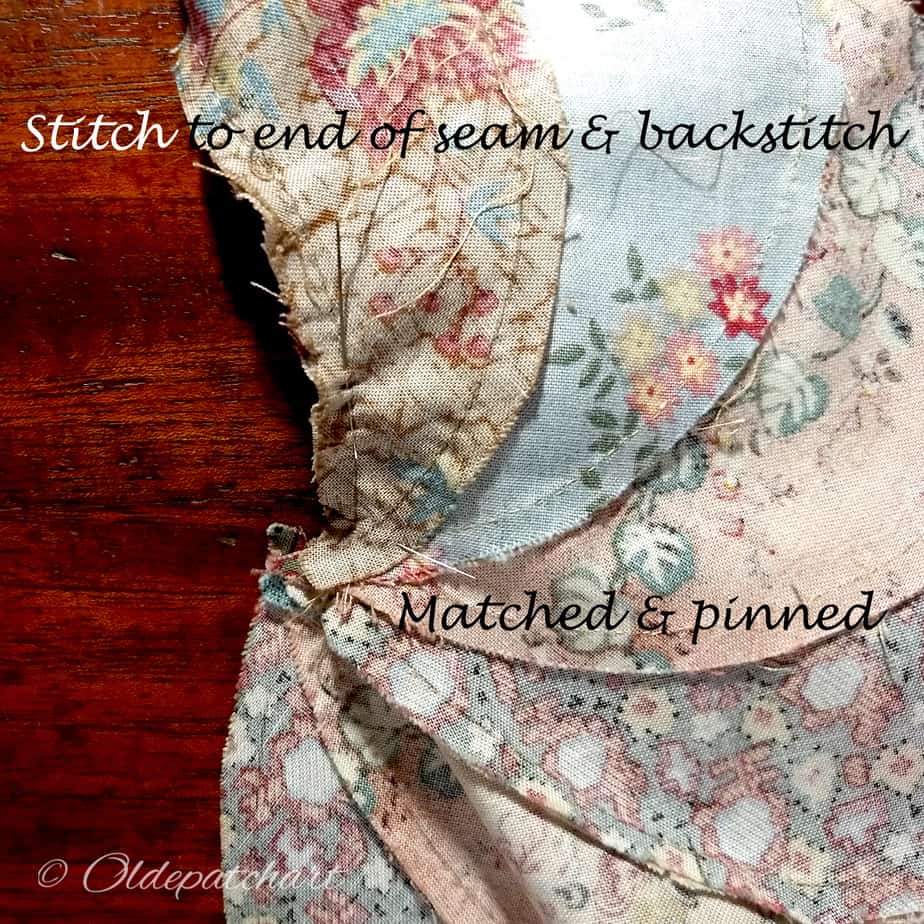
After reaching the centre of your seam, match and place your pin at the end of that seam as shown.
Continue to match and ease that seam together as you stitch.
When you are a few stitches short of the end, check both sides of your work to ensure that you will finish at the same spot.
Make any adjustments if necessary.
Once finished, do a few back stitches to lock that seam and snip your thread.
Here’s the Finished Seam Before Pressing
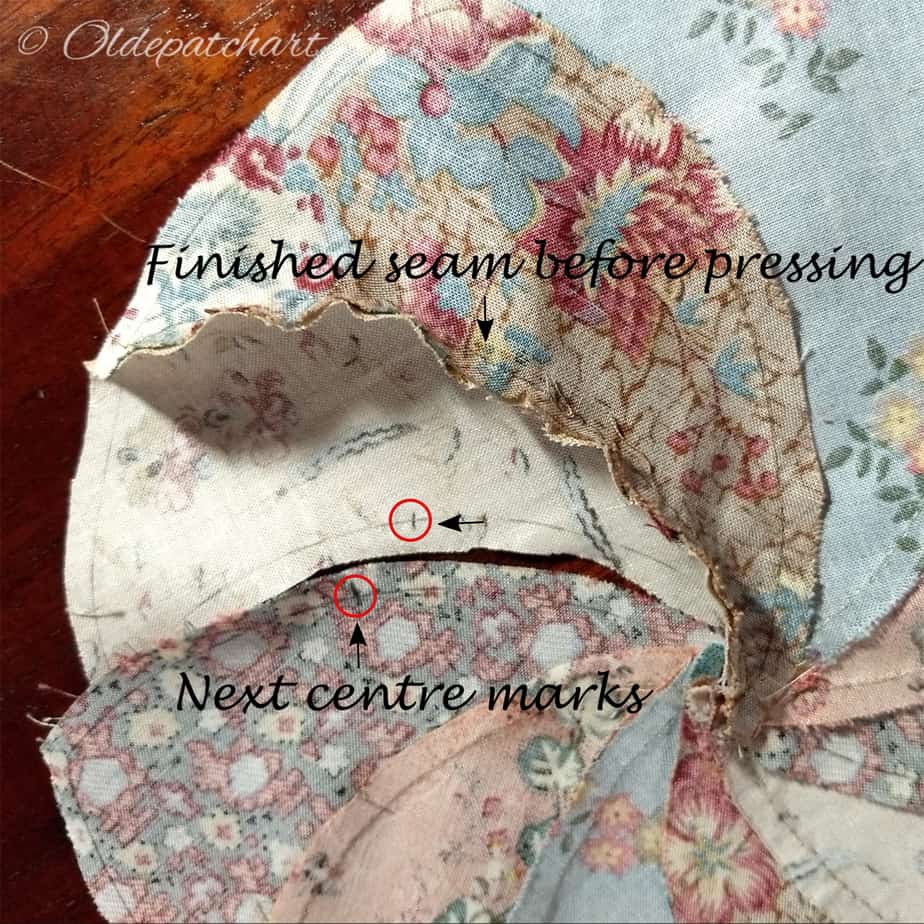
As you can see the seam curls around and is inclined to want fall in the opposite direction.
To prevent bulk and for the seam to lay flat it's important that you press the seam with the hill facing uppermost with the unclipped seam on top.
I like to finger press or iron each seam before starting my next.
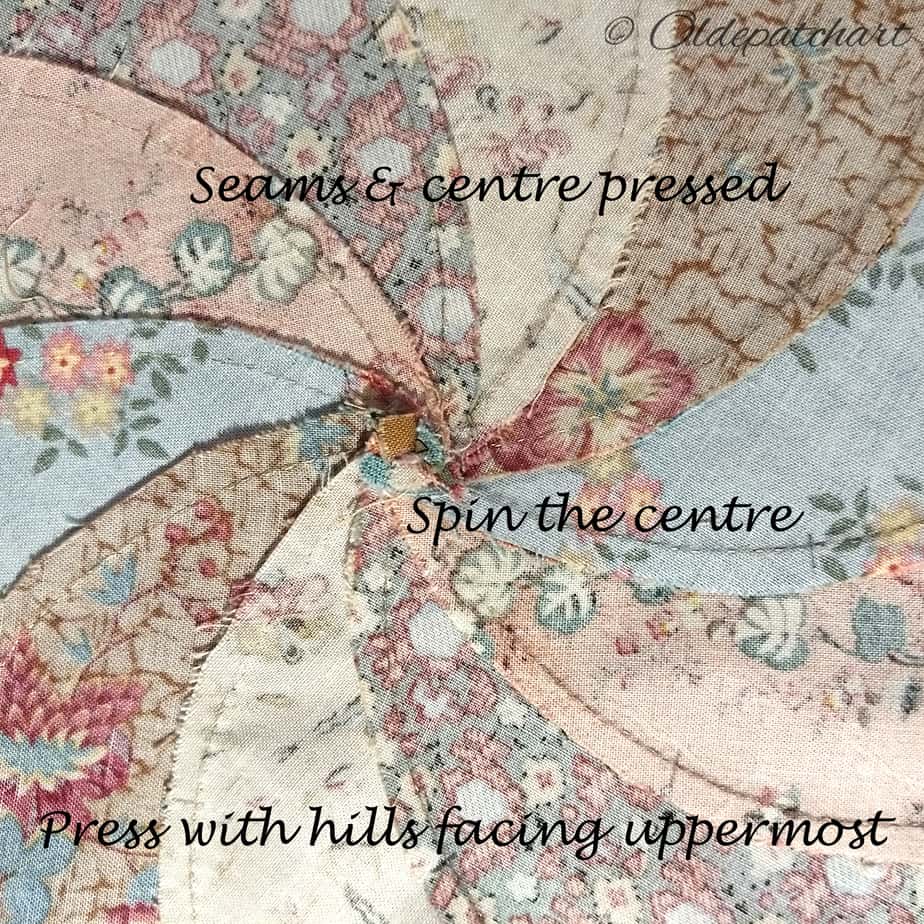
Seams Tight with that Pressed Pretty Centre
After stitching your very last seam, back stitch as before.
Next carefully move around your block in the same direction as the segments swirl placing your needle thru the very tip of each segment.
Ensure that you aren't catching the next seam allowance and go through each tip methodically, tightening your thread as you go.
Once you get back to the beginning that is when you want to yank that thread up nice and taut without breaking it and then secure with a few back stitches.
Lastly press your block from the back......make sure the centre spins in the same direction as your seams......it should now be sitting nice and flat.
I like to give that bugger a shot of steam right about now.....then flip and repeat on the front of your block.
Yay for steam!
Lollipop Swirl: Up Close & Personal
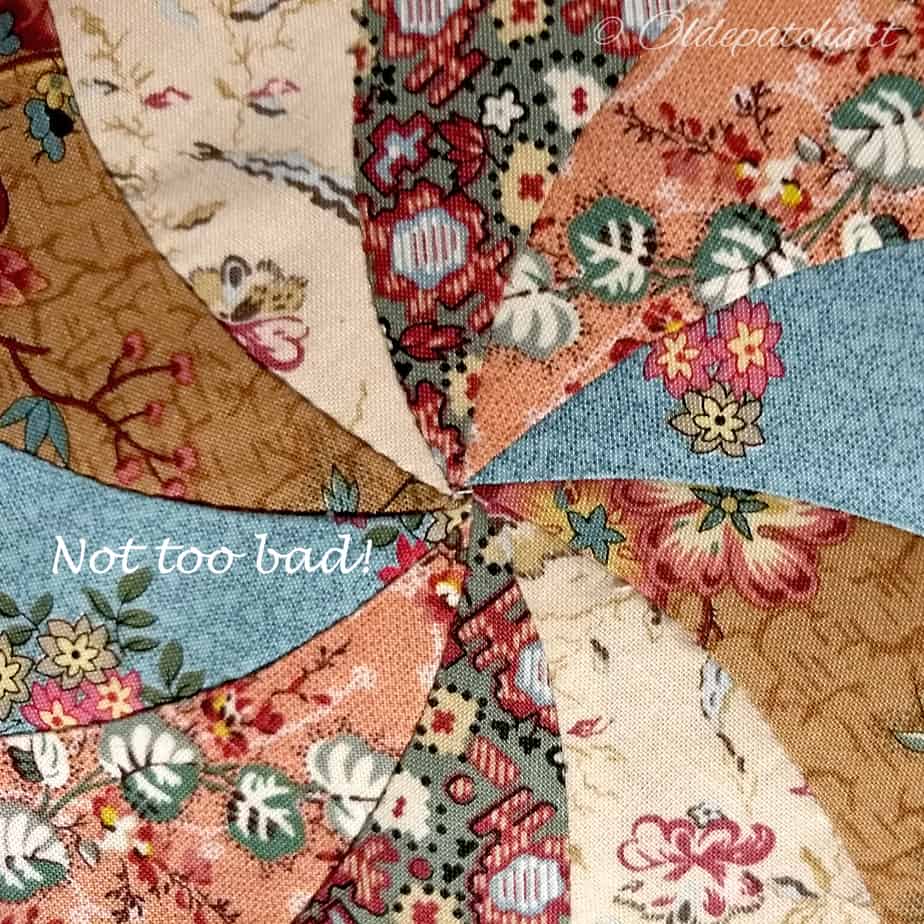
Eeeeekkkk, okay let's go with a closeup of that centre!
Brave I know, but I'm pretty happy with this.
Hopefully my 'Lollipop Swirl Piecing Curves Tips and Tricks' blog post will help you find piecing curves to be less daunting.
Let me say it again..........Embrace Your Curves.
The Finished Lollipop Swirl Block
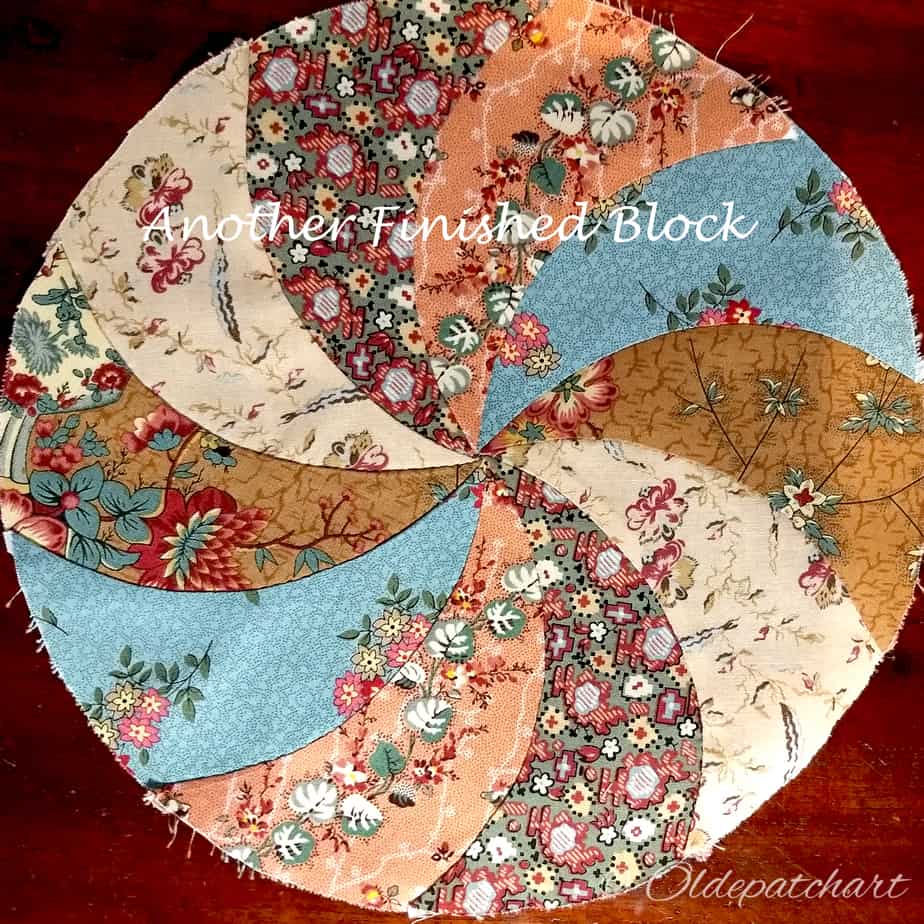
Here's my finished block in all her glory.
A beautiful combo of Dutch Heritage, Lisa, Lou & Di's fabrics.
Disclaimer: My Lollipop Swirl blocks spin in the opposite direction to the pattern ........all because I didn't check when tracing my template. Woops!
I'm told I have done it this way because we live in the Southern Hemisphere where our water spins in the opposite direction.
I actually think subconsciously the inner me wanted them to spin clockwise as that seems to make the most sense in my brain!?!
Whatever the case make sure your blocks spin in the right direction FOR YOU!
Lollipop Swirl FREE PDF Pattern Download
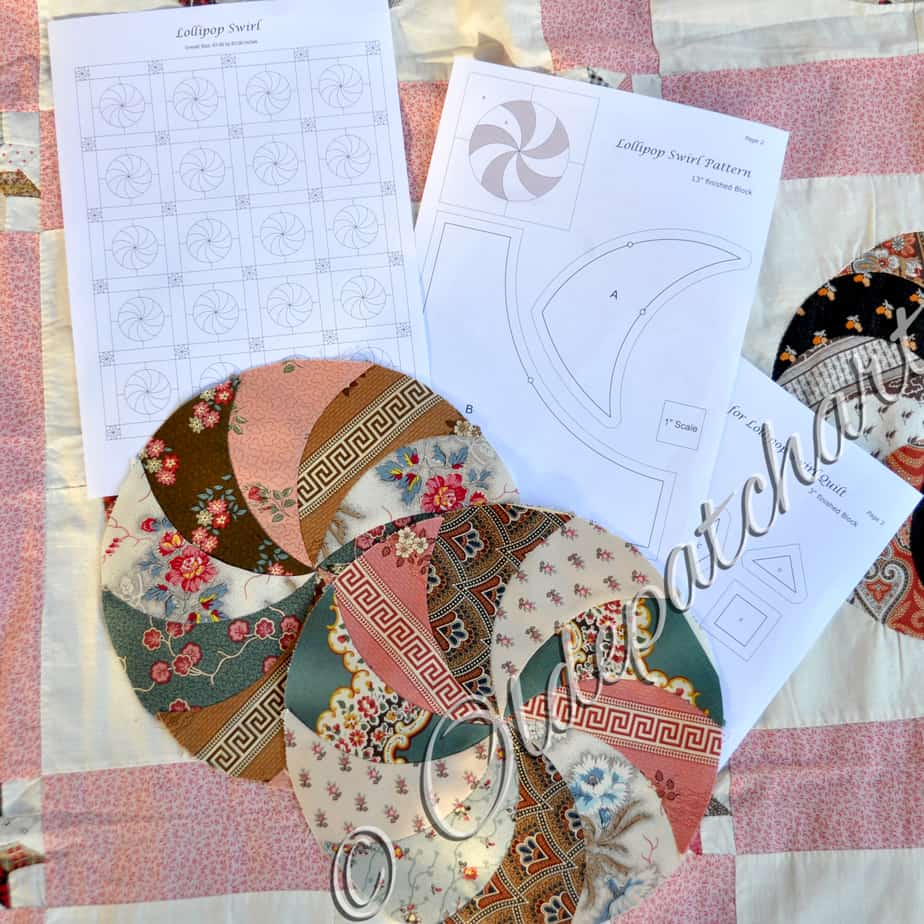
In case you missed it here is the link to your FREE Lollipop Swirl Quilt block PDF pattern.
BEFORE printing, please read the directions in the listing on how to download and print your pattern to ensure it is the correct size.
Here's a link to a blog I have written re How to Download and Print a Digital PDF Quilt Pattern
One Last Look at my Sweet Lollipop Swirl Blocks

Let's finish off this post with one last look at two of my sweet Lollipop Swirl quilt blocks.
I really hope you enjoy making your own Lollipop Swirl Blocks using these tips & tricks for piecing curves.
When posting your finished block/quilt on Instagram please tag me and use the hashtag oldepatchartlollipopswirl I would love to see your blocks.
Feel free to message or email me if you have any issues or questions: feedback is always welcome.
Please follow me on instagram: oldepatchart