Oldepatchart Method
Here's my method for fussy cutting......aka Fussy Cutting 101 Oldepatchart style.
Anyone that follows me on instagram - Oldepatchart already knows that I adore fussy cutting and effectively making my fabric into Swiss cheese!
There's something deep within me that feels the need for pattern, symmetry & repetition.....then there's the serendipity of secondary patterns that can emerge!
Oh joy.......it all gladdens my lil' ol' fussy cutting heart.
I love the challenge of making a new piece of fabric that no longer resembles the original.
I call what I do: fussy-as-fark.
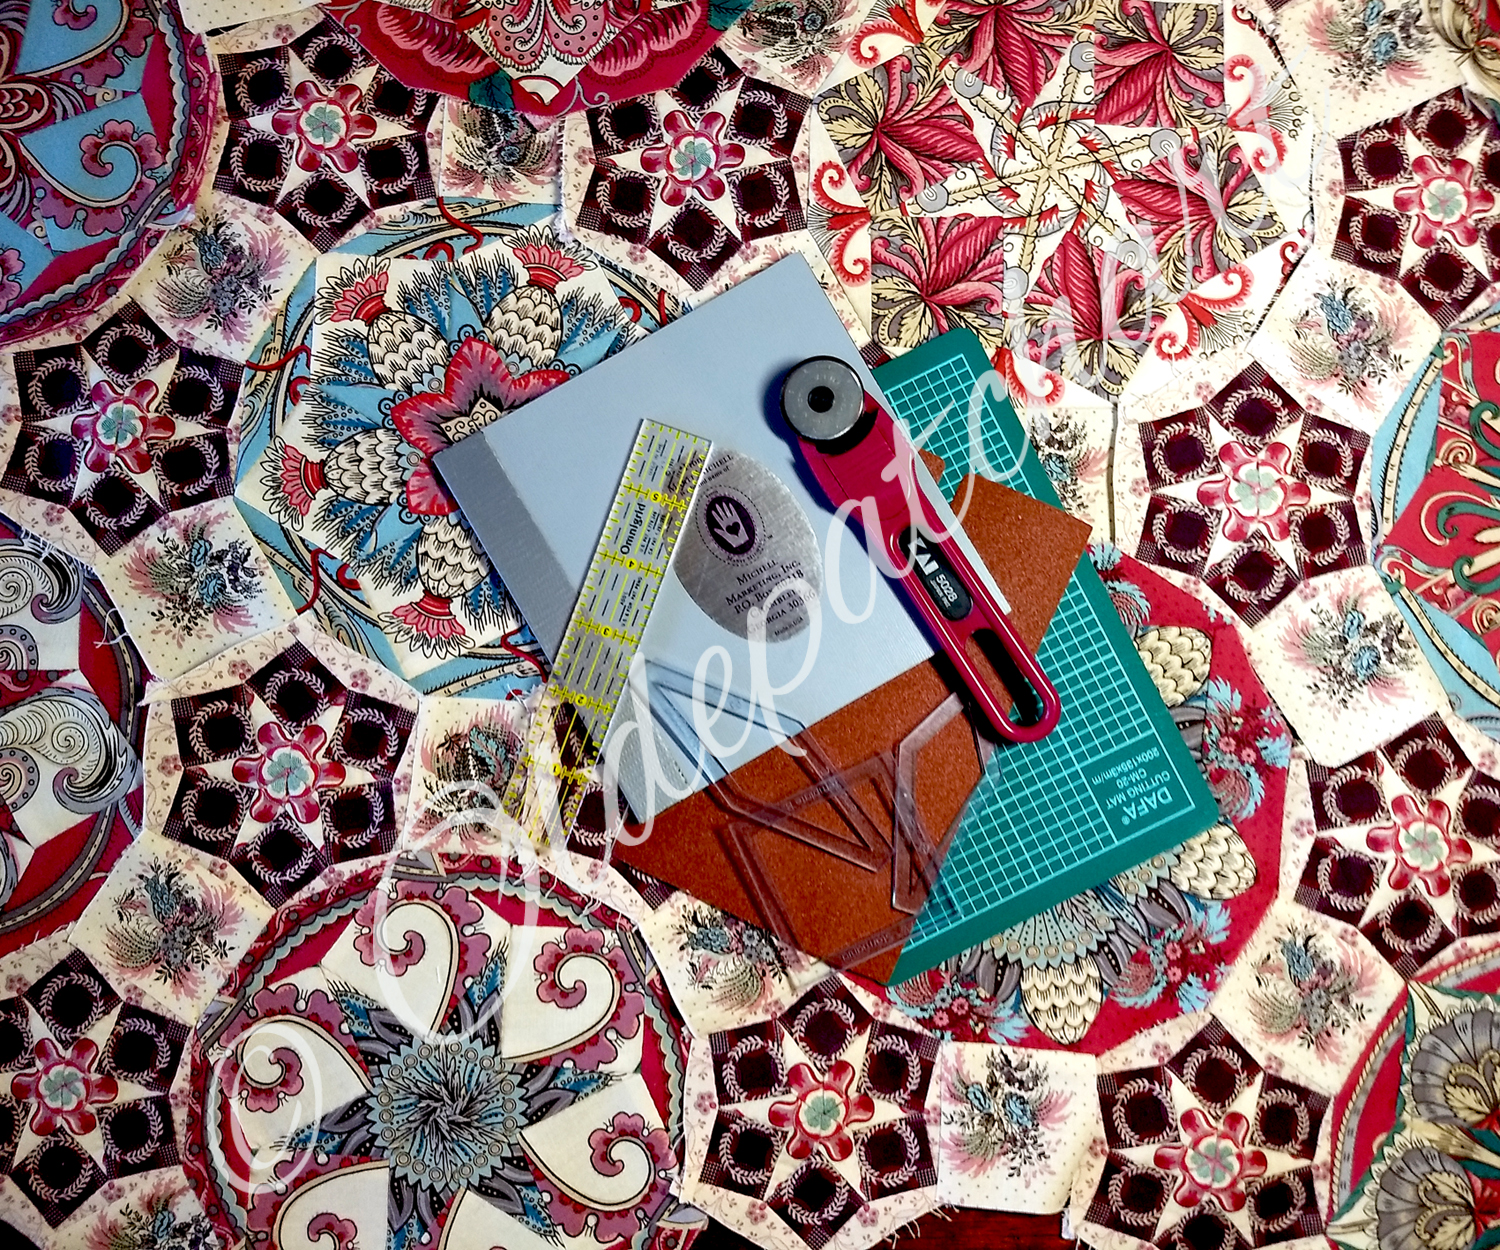
Gathering up your Notions
First step is to gather your notions.......really there's only a few necessary tools beside having a bunch of awesome fabric.
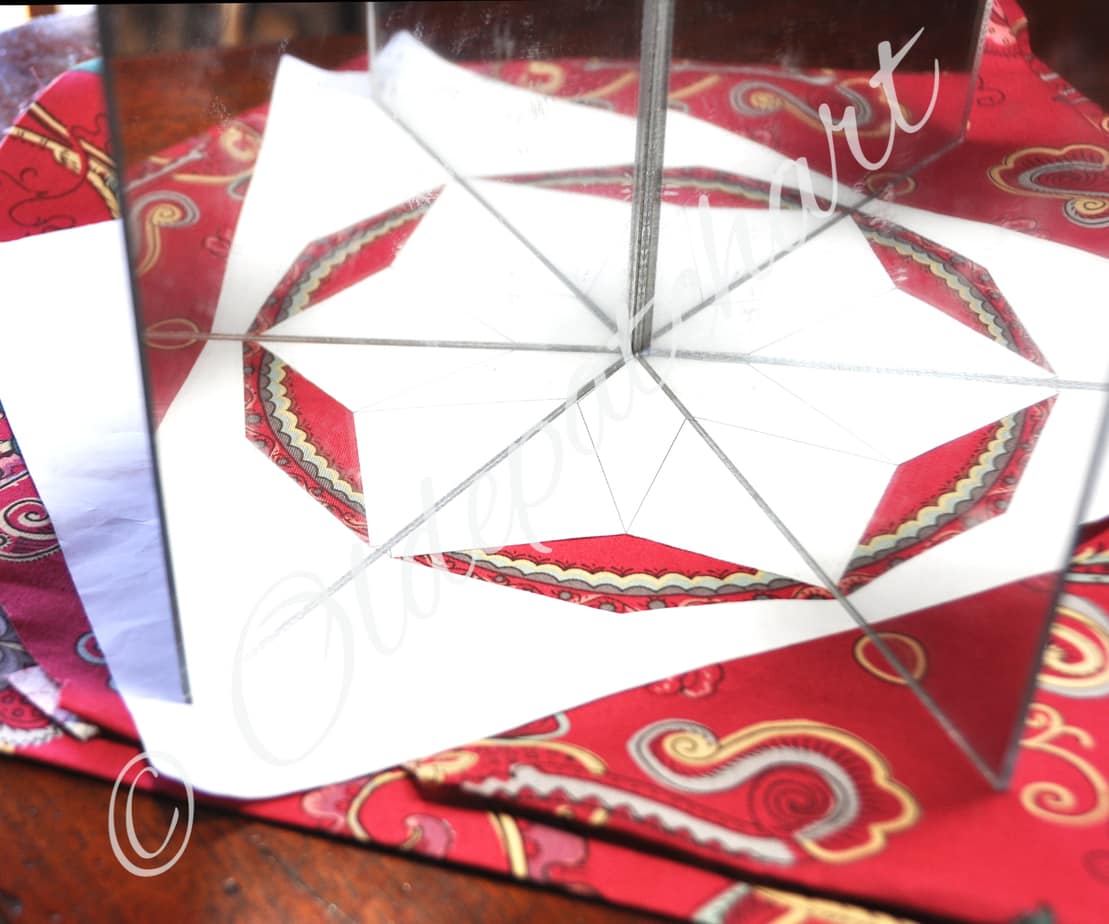
In my opinion the best thing you can do for successful fussy cutting is to invest in a hinged mirror.
The one pictured here is Marti Mitchell's 'Magic Mirror'. You can purchase them in Australia at: Punch with Judy
Alternatively you can ask your local glass maker for two acrylic mirror off cuts each measuring approx. 6" x 6" and tape them together.
Hey presto.....a fussy cutting mirror!
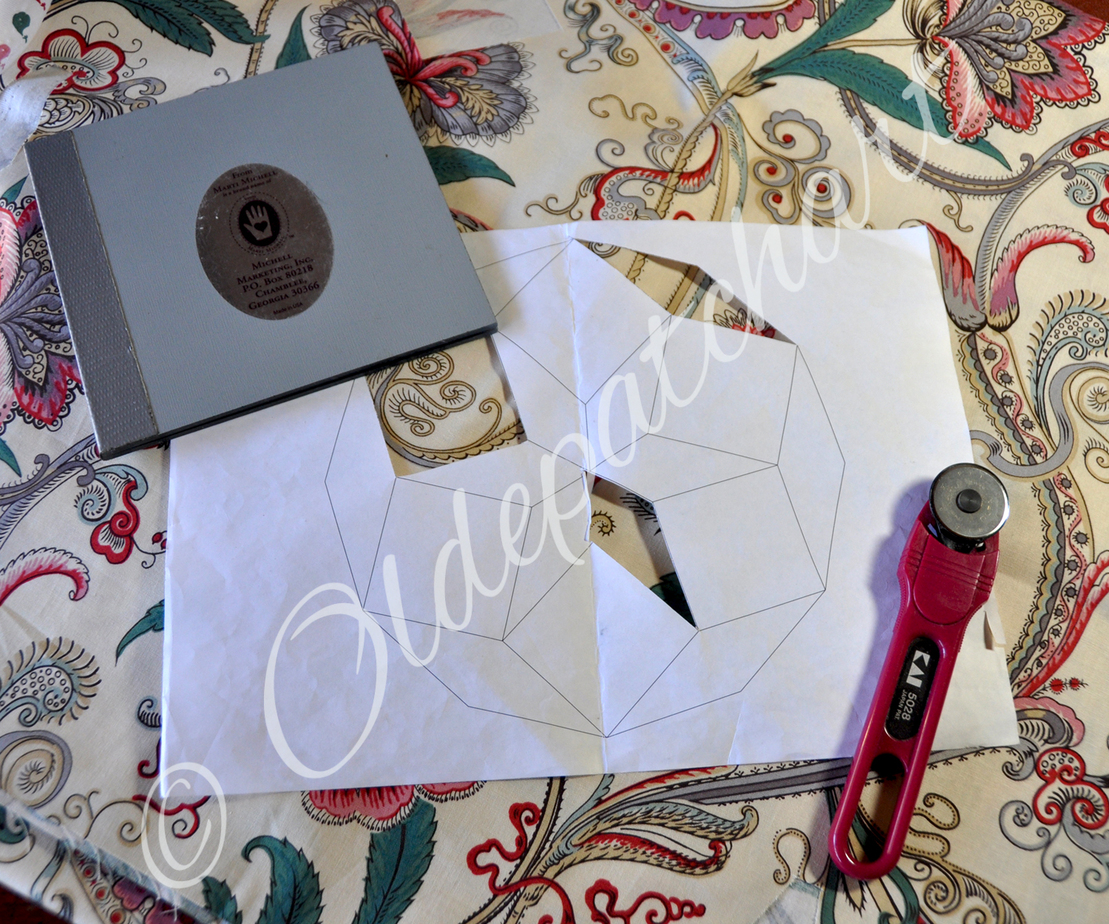
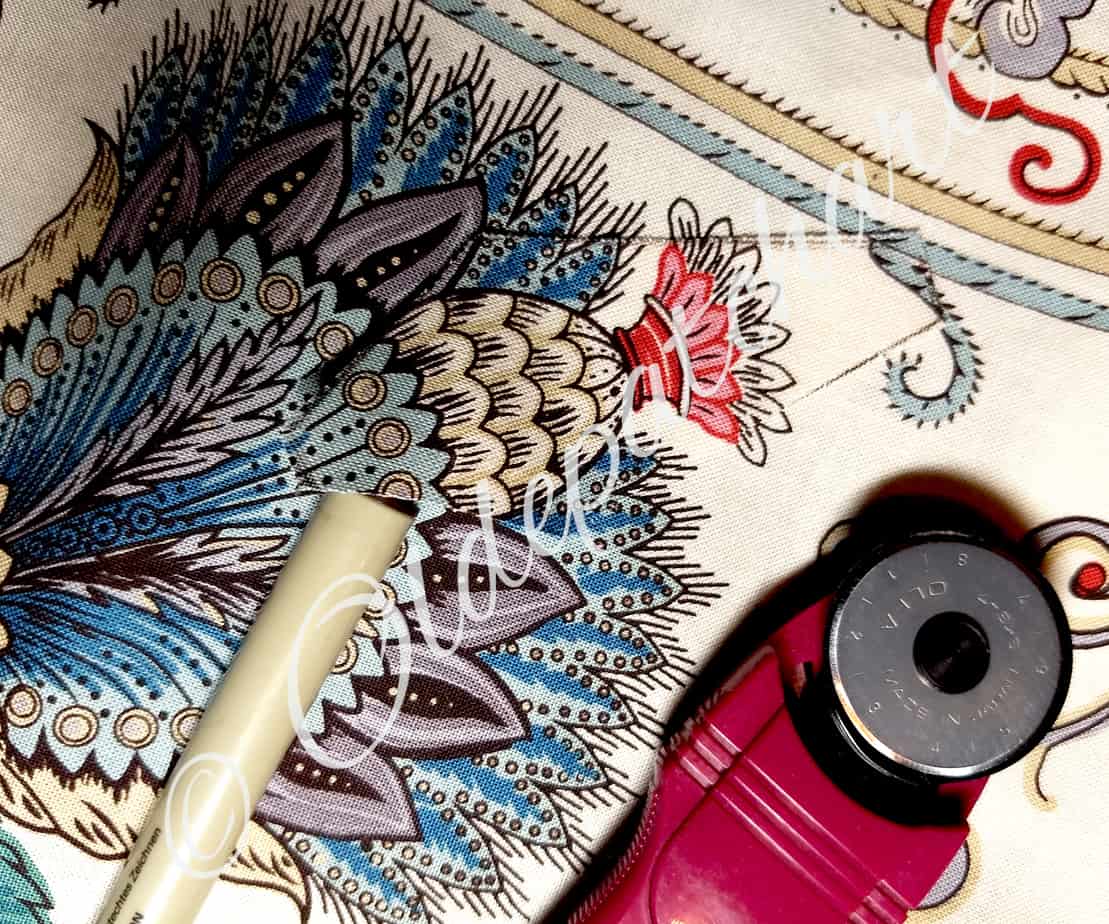
You will also need a small rotary cutter, mini cutting board, pigma pen or sharpened mechanical pencil, piece of sand paper and lastly a copy of your printed pattern to scale.
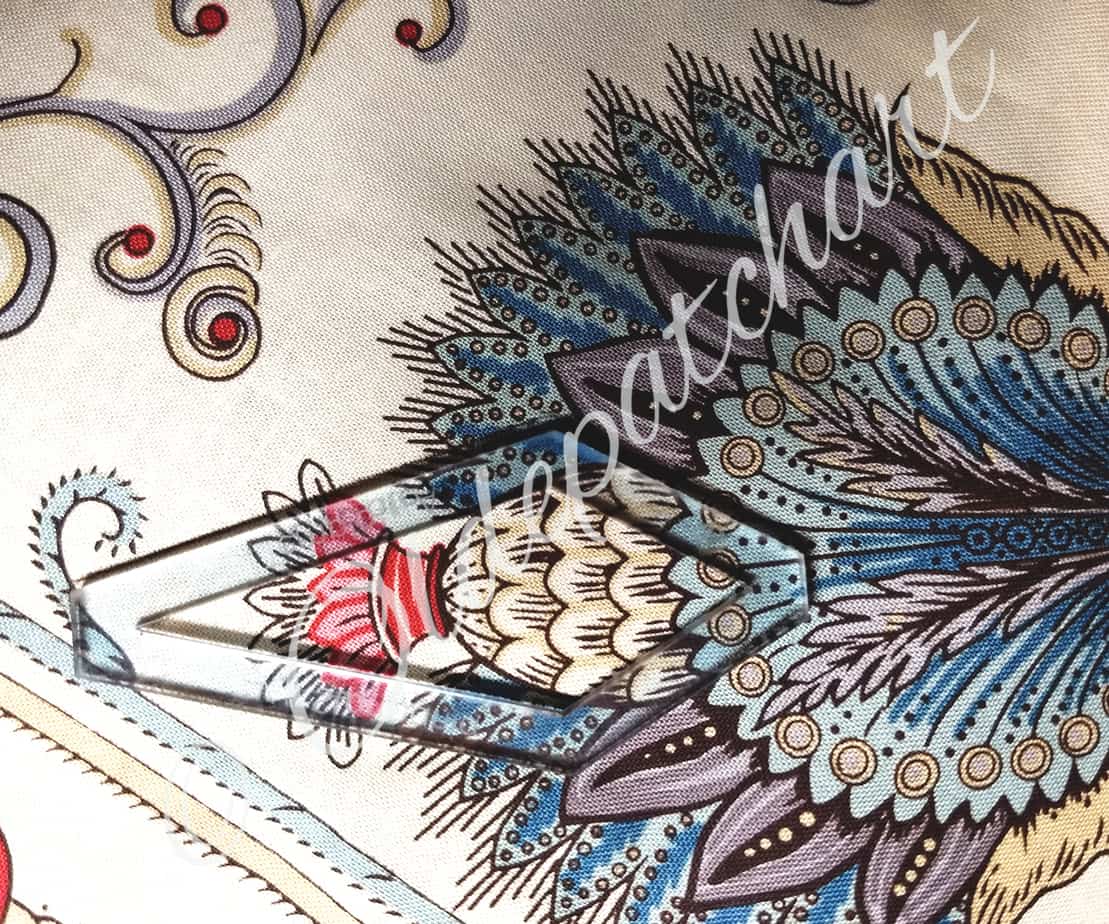
Carefully cut out a viewing window for each shape from your pattern.
Preview Your Design Using Mirrors
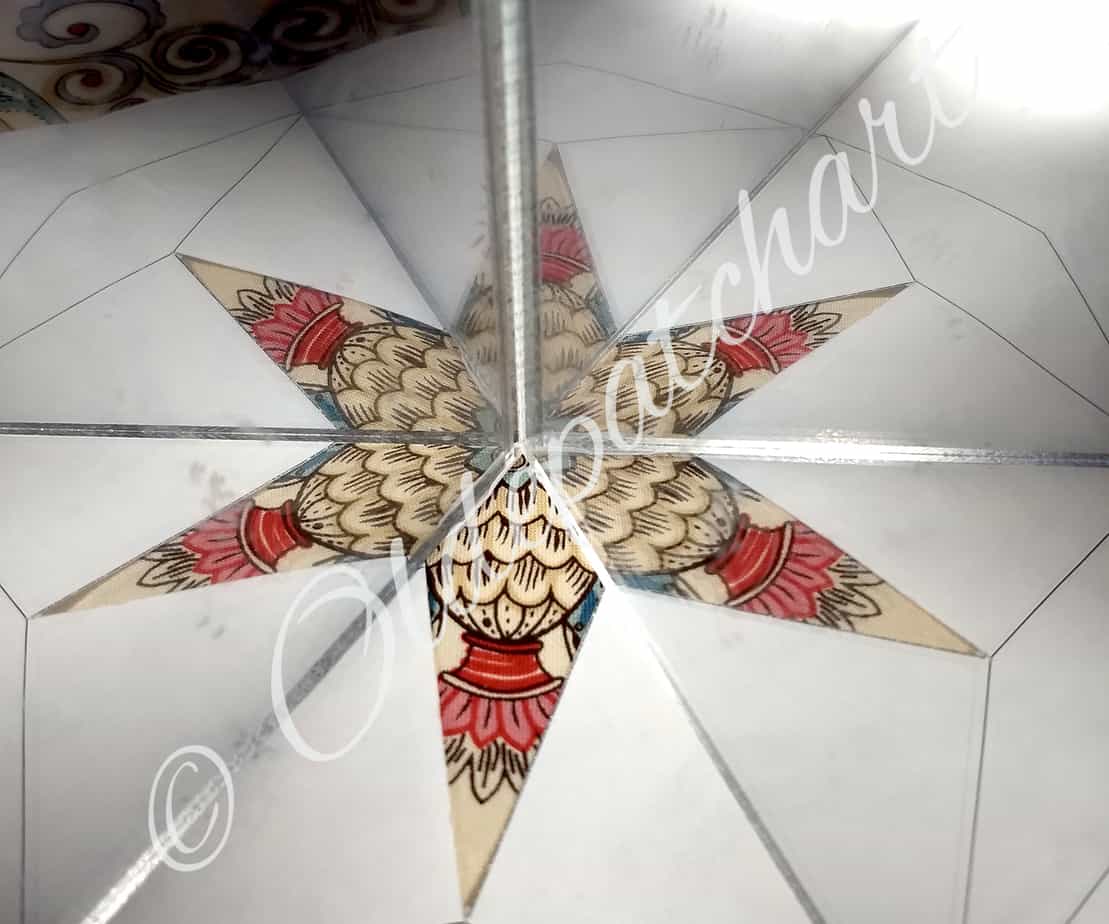
Using your first shape (A), move your viewing window around the fabric looking for motifs that interest your eye.
Open the mirror & place the two edges upon the angles of shape (A) to preview your design.
In this case each kite shape meets at a 60 degree angle in the centre.....this is the same angle the mirror will be opened to.
As a result you will see six repeats in the reflection.
Have some fun moving your viewing window around to discover what might make an interesting centre for your first block.
A really good tip is to take photos as you go.....you can then flick through from one option to the other before actually committing to cut fabric!
Trial your Shapes using Colour Photocopies
Here's a valuable tip from Karen Howes of Faeries & Fibres.
BEFORE cutting into your precious fabric; especially if you only have a treasured small piece; is to make colour photocopies of your motif.
Now cut your paper copies to see to see if you are happy with your design.....(trace and cut the finished sized shape for your block).
You can also see what other designs are possible from the same section of fabric.
Go to Karen's blog Faeries and Fibres for more fussy cutting tips, tricks and tutorials.....plus a wealth of other information!
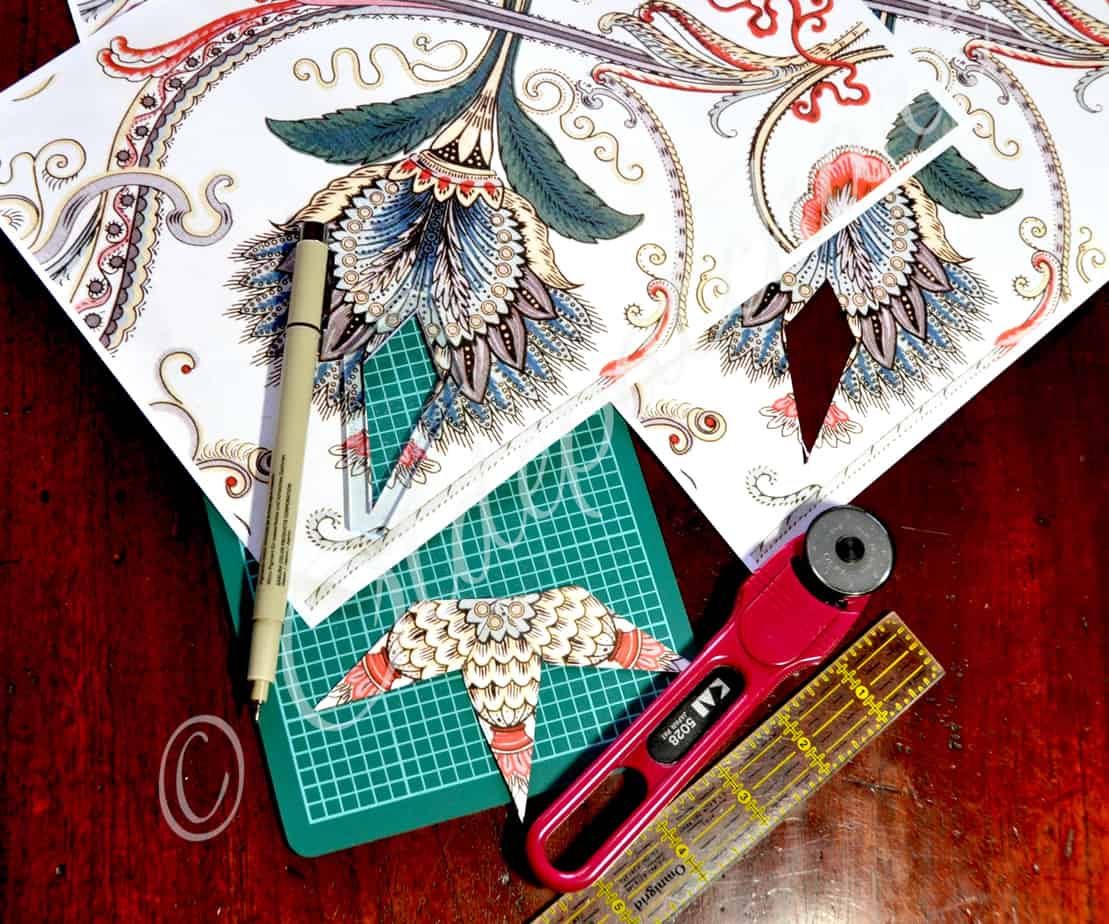
Marking your Shape
Now that you have decided on the motif.....place your template exactly where you've decided.
Refer to the photo on your camera if need be.
Carefully look for symmetry ensuring that wherever your seams will meet that that the design will match.
Often a motif isn't 100% symmetrical which is where a little wizardry comes into it......do your best to trick the eye!
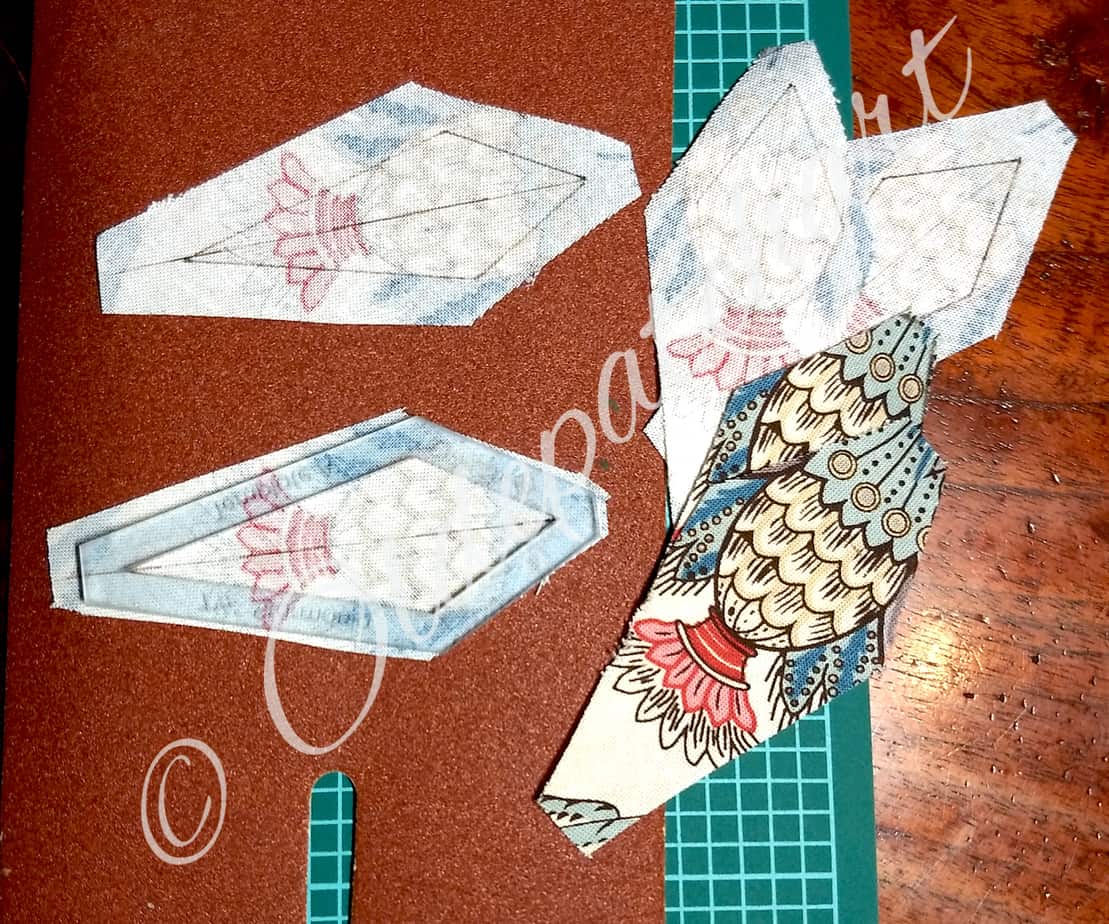
Once happy with the placement, trace around the outside of the template on the right side of the fabric.
Cut on this line carefully with your rotary cutter or scissors if you prefer.
When doing EPP I leave a three eighths seam allowance by cutting a smidge to the outside of the drawn line.
Cutting Your Shapes……Shhhhh!
Now this is where the quilt police need to look away as it breaks a cardinal rule!!!!!!
What I do is to take my first cut out shape and carefully lay that over the top of the repeat of a matching motif.
Use the surrounding design to get the exact alignment.
Then I VERY carefully use my rotary cutter to cut the duplicate shapes.
Now if you don't trust your fingers to that demon cutter......you could place the template over the top, trace the shape and then cut with a ruler & cutter.
Alternatively you can trace around your actual fabric shape - then use scissors to cut it out.
Your call......I don't want any bloody fingers on my conscience!
Mark Your Sewing Line
When marking your sewing line (or inserting your EPP papers) you need to be super, super, SUPER accurate.
I often mark the centre line before laying down my template to mark my stitching line.
Once again pay attention to where your seams are going to meet and accurately mark your line on the reverse side of the first shape.
If doing EPP, use a dab of glue to place your papers exactly where you want them onto each shape before turning your edges over.
When marking or gluing the subsequent shapes......look for markers so that when you line up your template you hit those exact same marks.
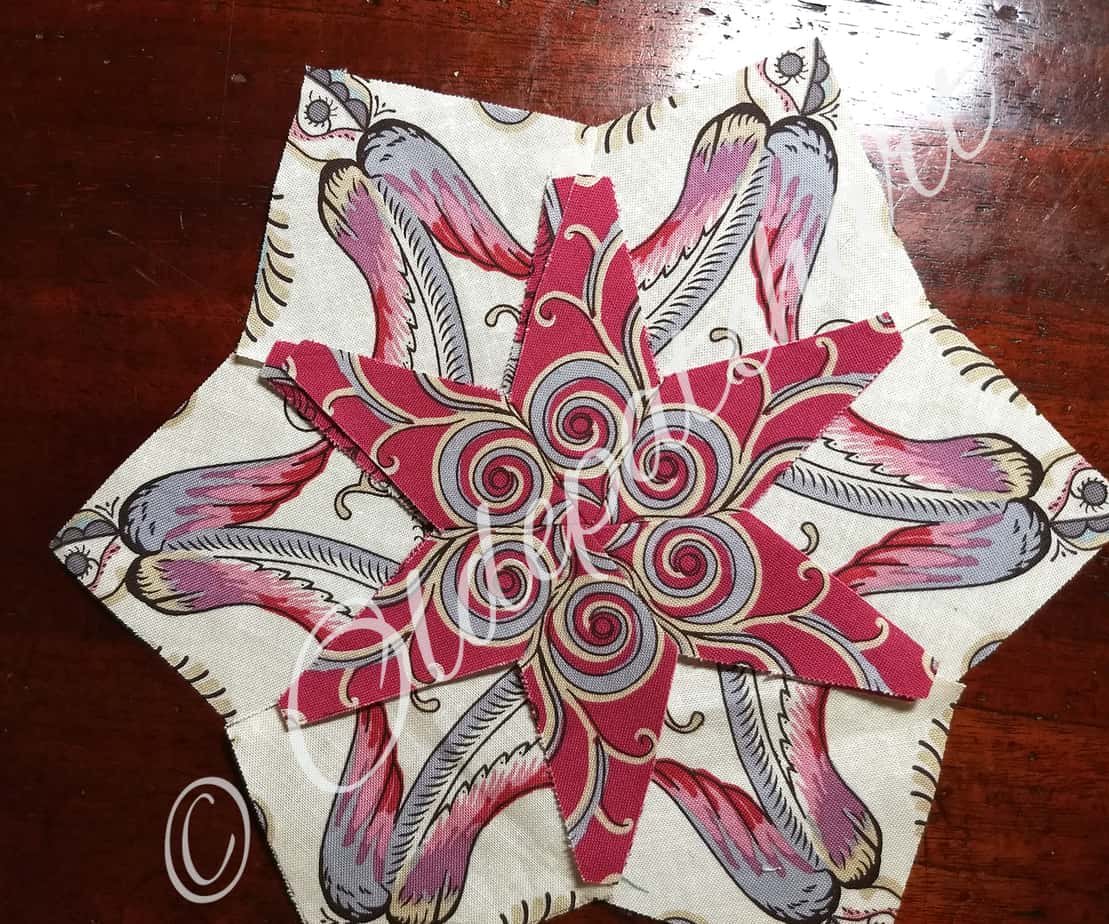
Preview Motifs for your Next Round
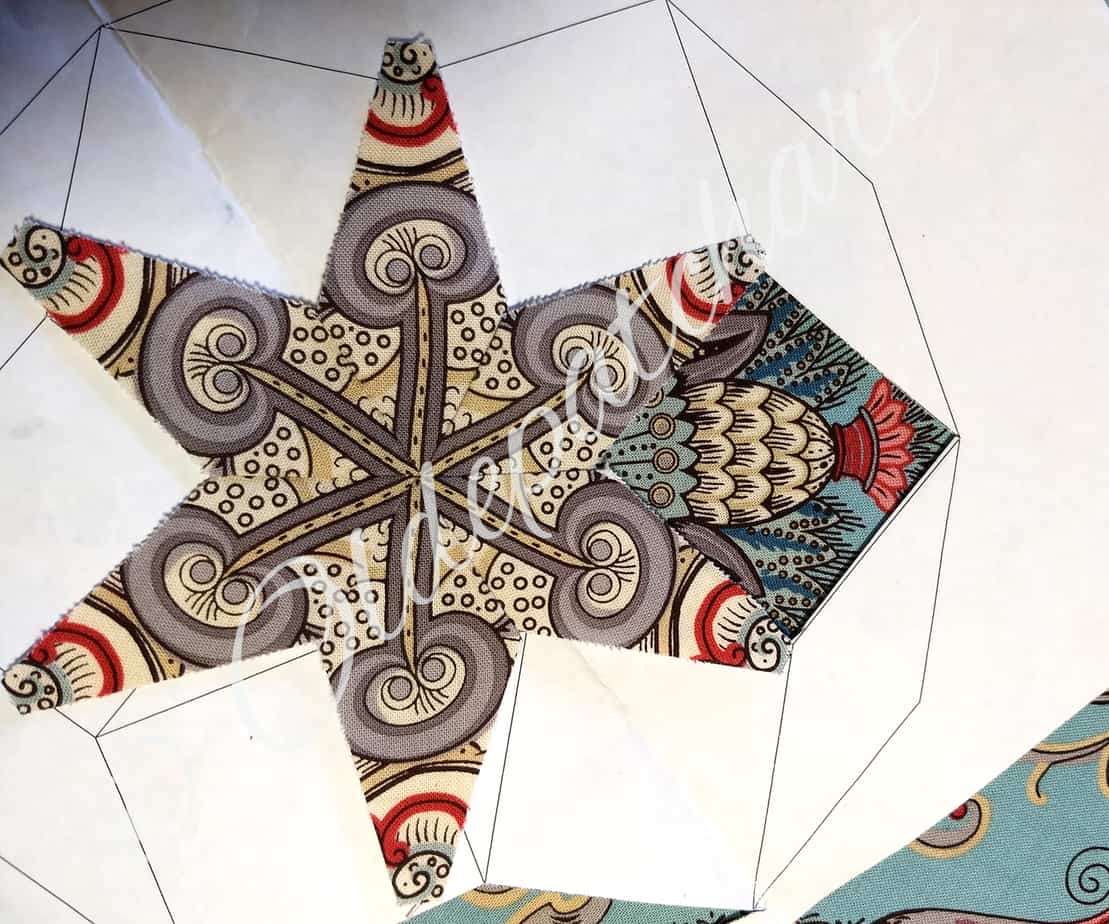
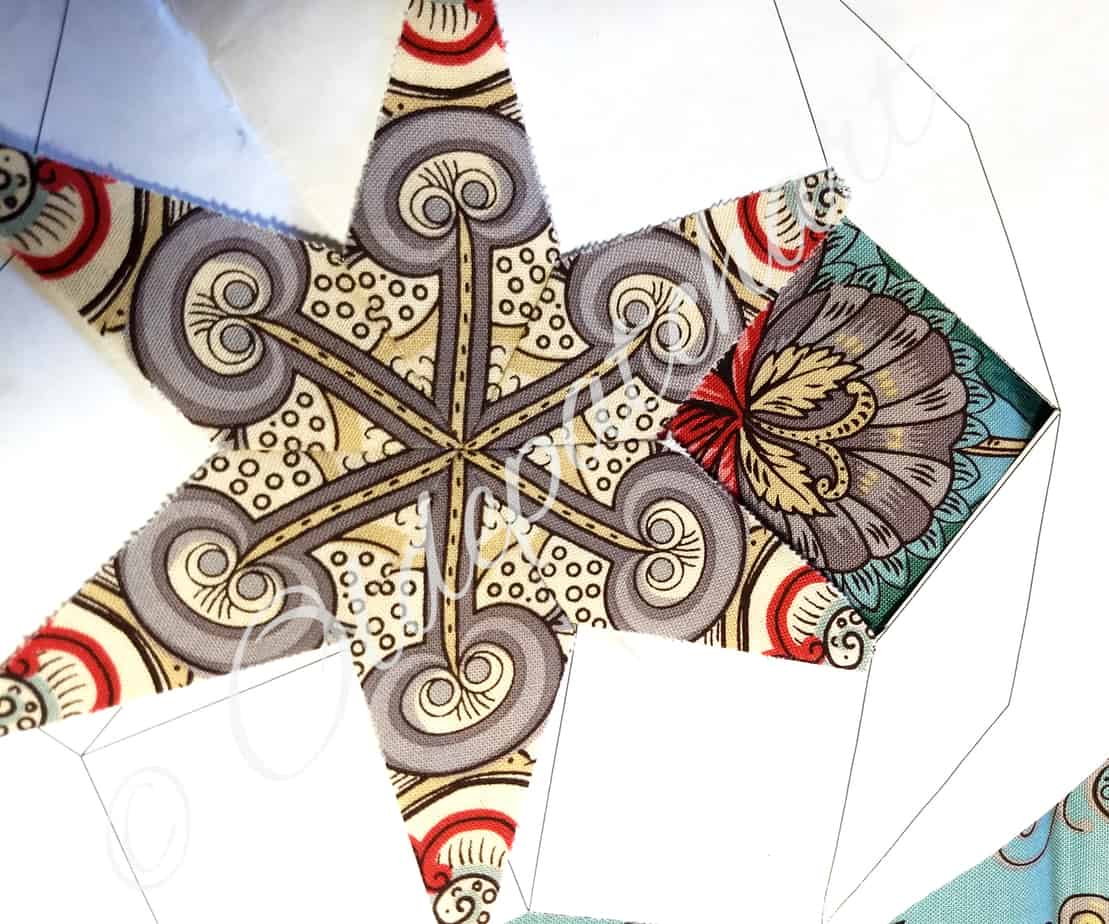
Once you have stitched together your centre....use it to preview the next round - in this case shape (B) - the square shape.
See above: I have placed my star back on top of the viewing window.....I then move it around my fabric to look for the next perfect motif.
I tried a few different options looking for something that may create a secondary design.......use your mirrors to help here.
Perhaps I will make a video in the future and go into further detail.
Preview….Preview….Preview
Here I have two different centres prepared which I am trialing against my next round of squares.
Remember you can also rotate your shapes to see if there is a more pleasing arrangement.
Ohhhhh the joy of fussy cutting.
So which one do you think I went with!?!
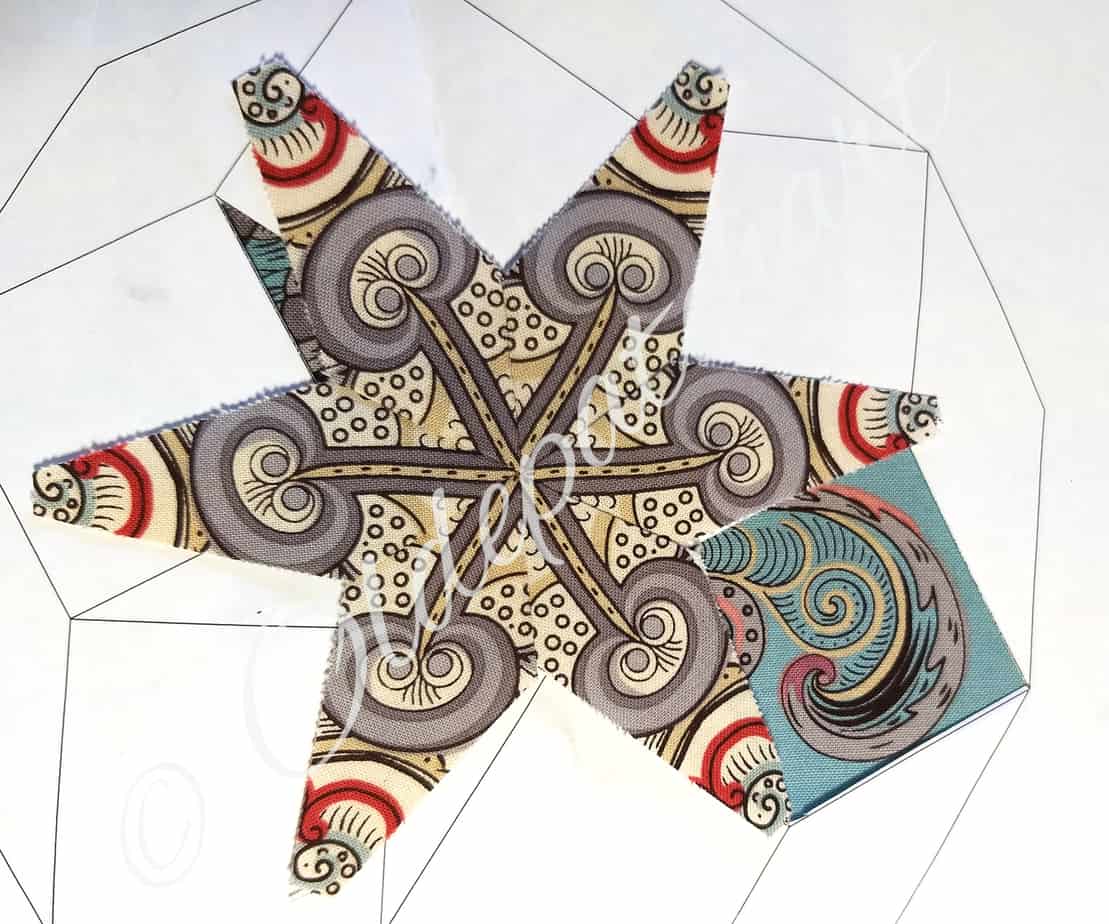
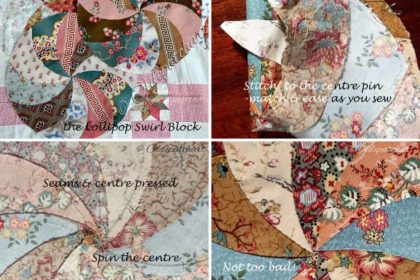
Third and Final Round
Here we go......the third and final round of my Starmania block.....template (C).
I had a couple of other options in mind but also found this one I really liked using the viewing window and mirrors.
What do you think?
Preview Using Window Viewer
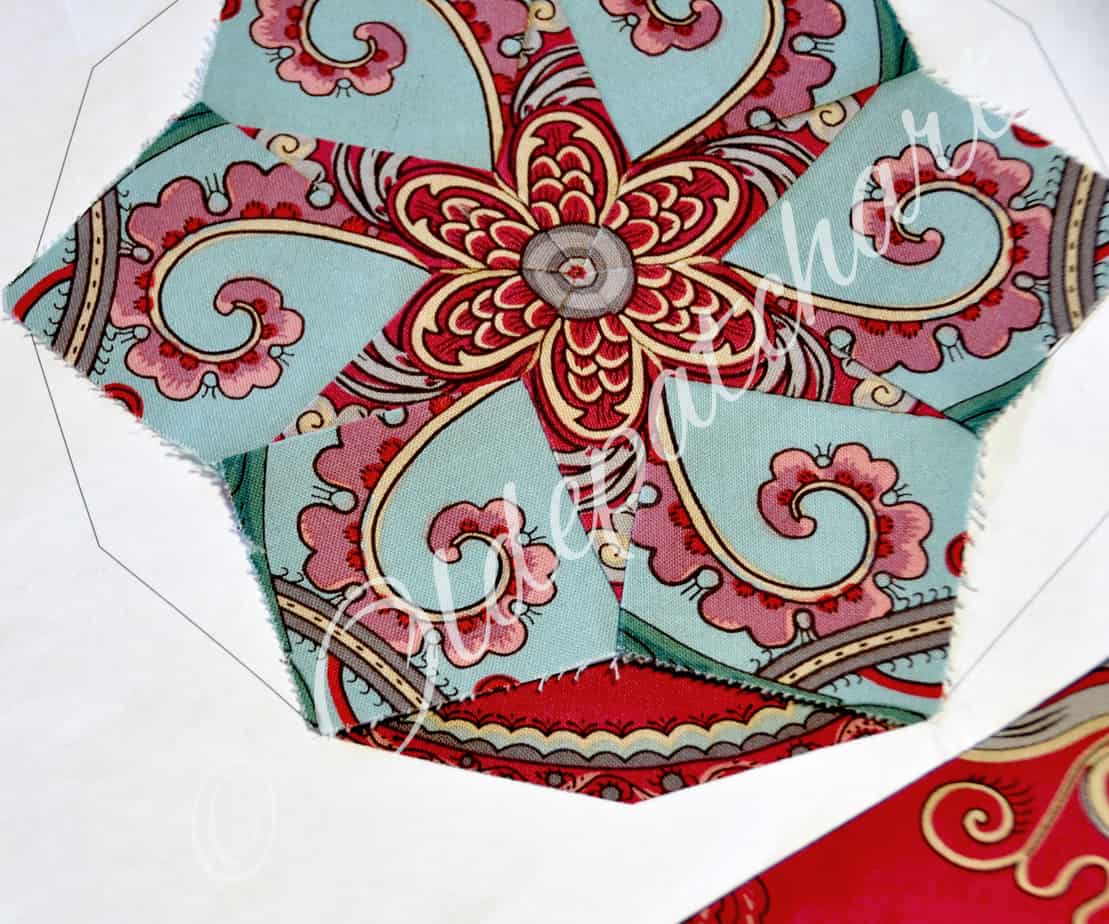
This is what it looks like in a quick n' dirty trial using my viewing window.
Use the mirrors to see if you like the outer ring before cutting.
Hmmmm….One, Two or Three!?

Hmmmmmm I think I like the third option and I now have something else in mind for the other two.
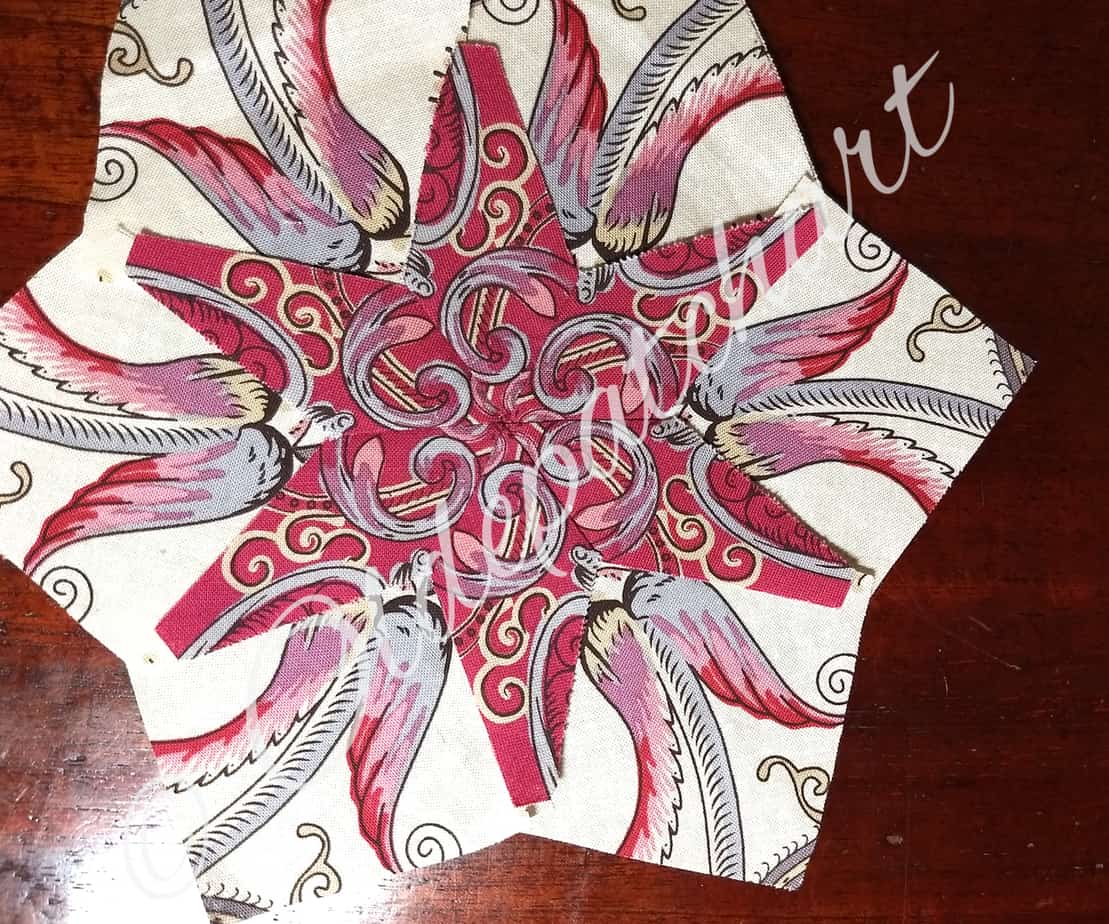
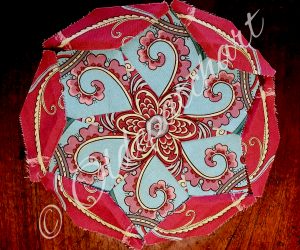
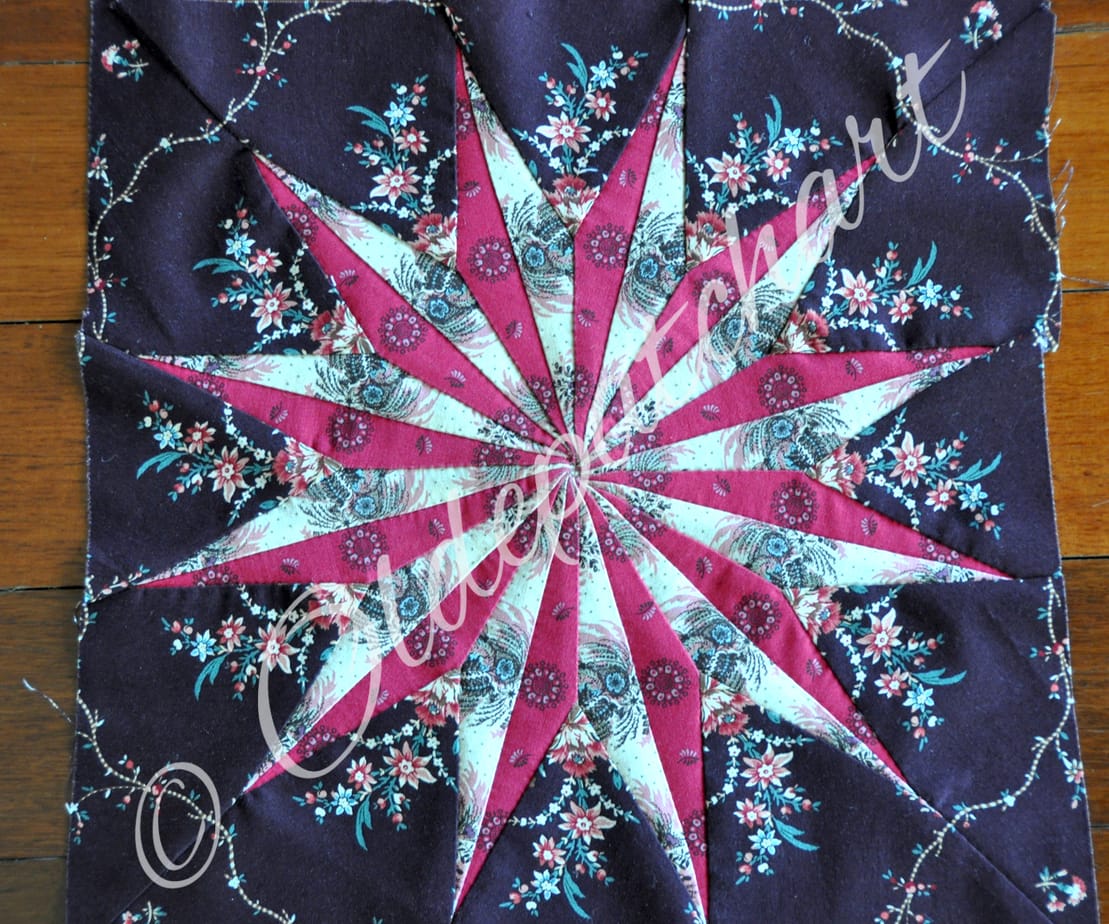
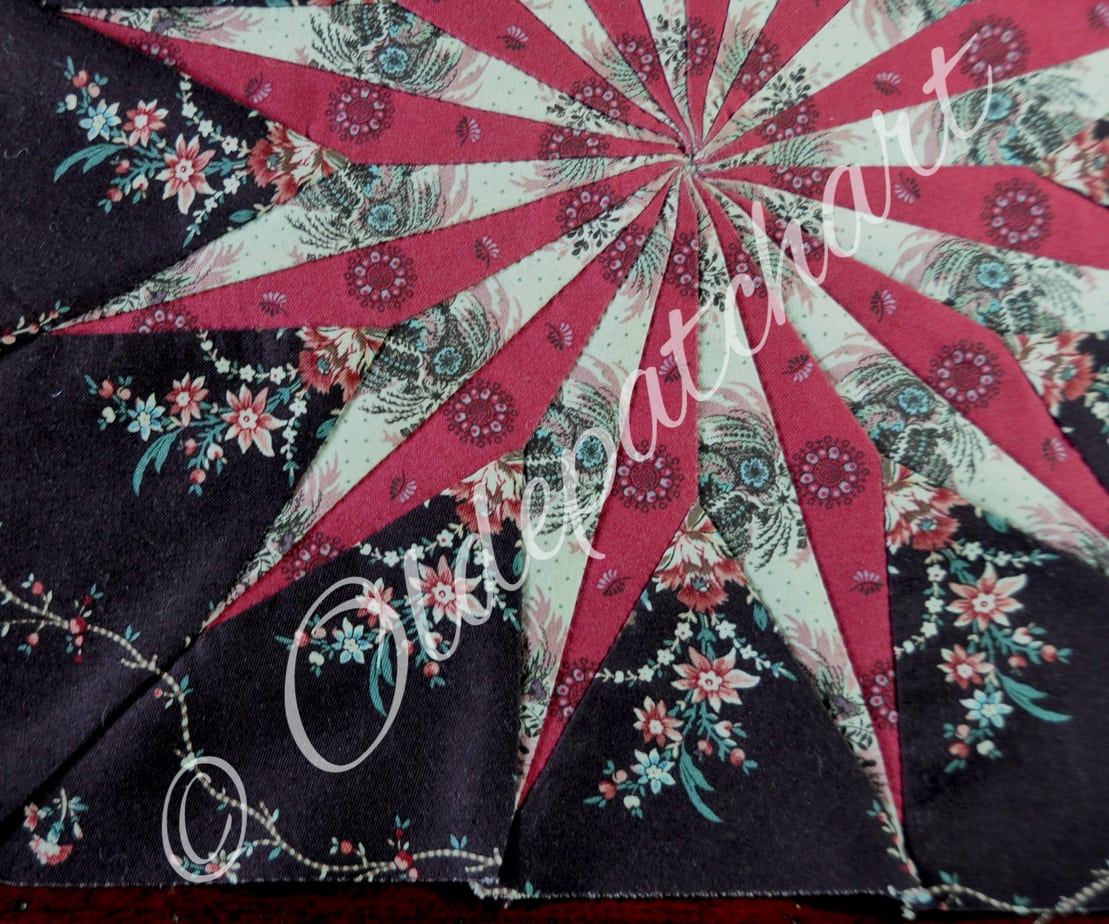
Finished…..Yay!
Sooooo folks here is my finished Starmania block.
I like to call this one my octopussy block....don't they look just like tentacles!?!
In actual fact that would be 'mutant octopussy' as this guy is clearly missing two arms.
Did mumma octopus chew them off at birth or was he born in Japanese waters!?
I am pretty happy with this block and will now use the alternate outer choices to finish off my other blocks.
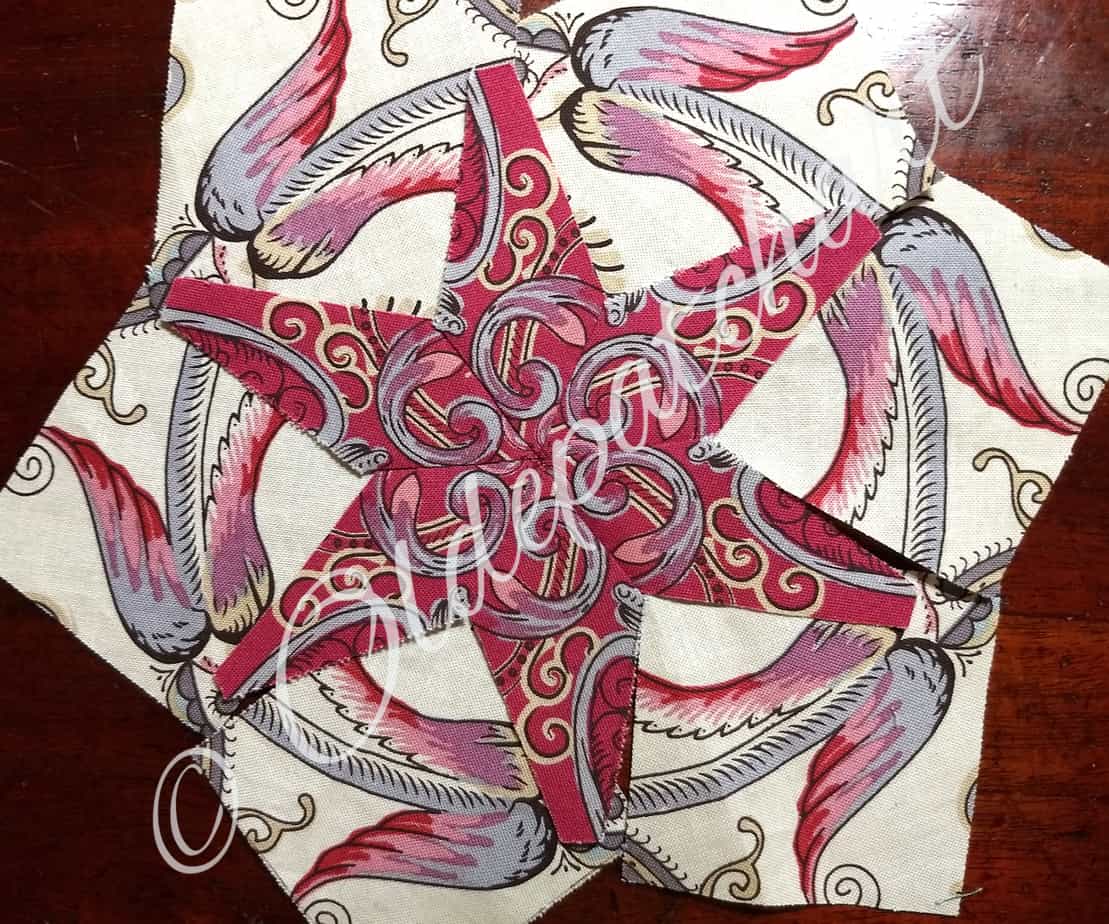
Obligatory Close-up….Just Because
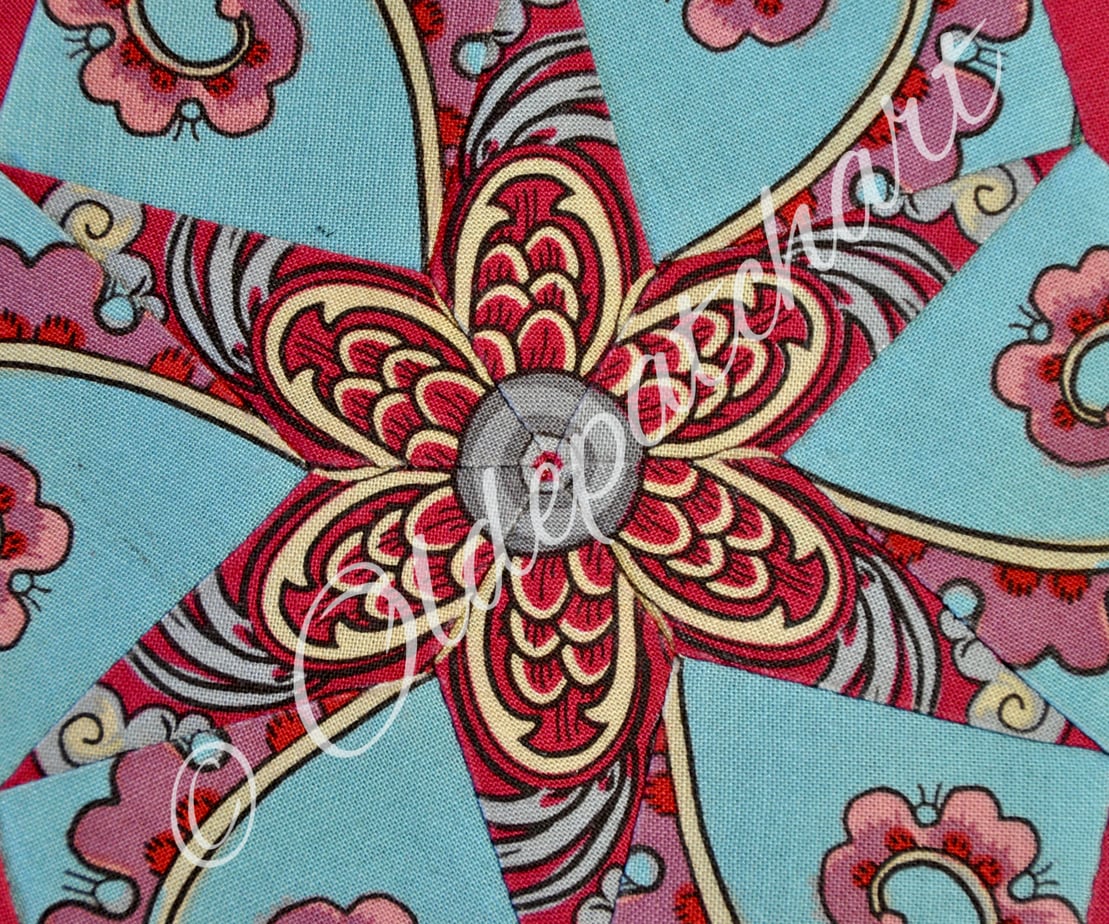
And also the obligatory close up......just because!
The centre reminds me of a circle of pineapples.
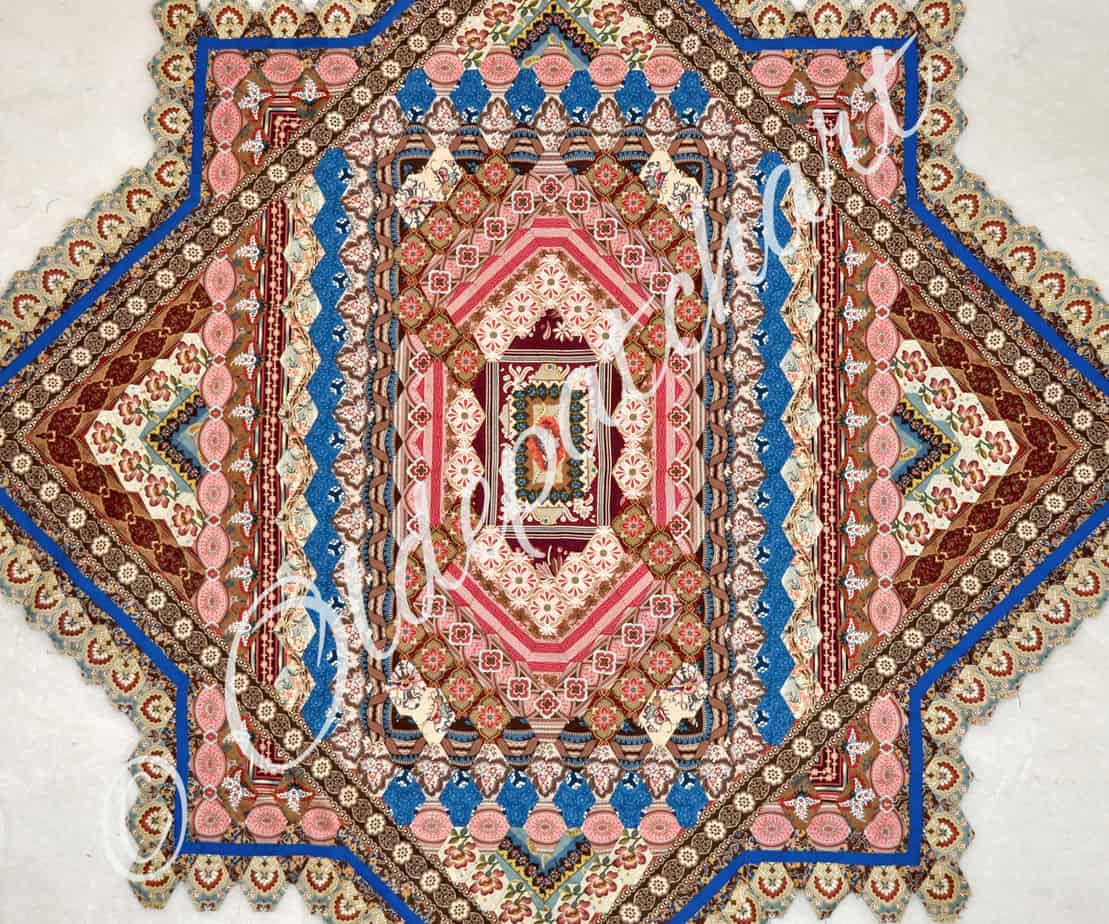
Bit More Fussy Cutting 101 – Oldepatchart Style
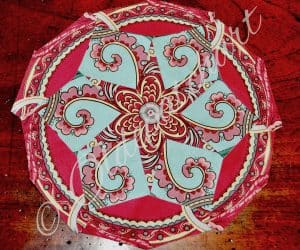
Here's the centre medallion for my Dutch American Sew Along quilt which I fussy cut & hand pieced.
I hope this blog post - 'Fussy Cutting 101 - Oldepatchart Style' has been helpful in showing some of my fussy cutting process.
In the future I may do another blog or video going into further detail re choosing fabrics and capturing secondary design elements etc.
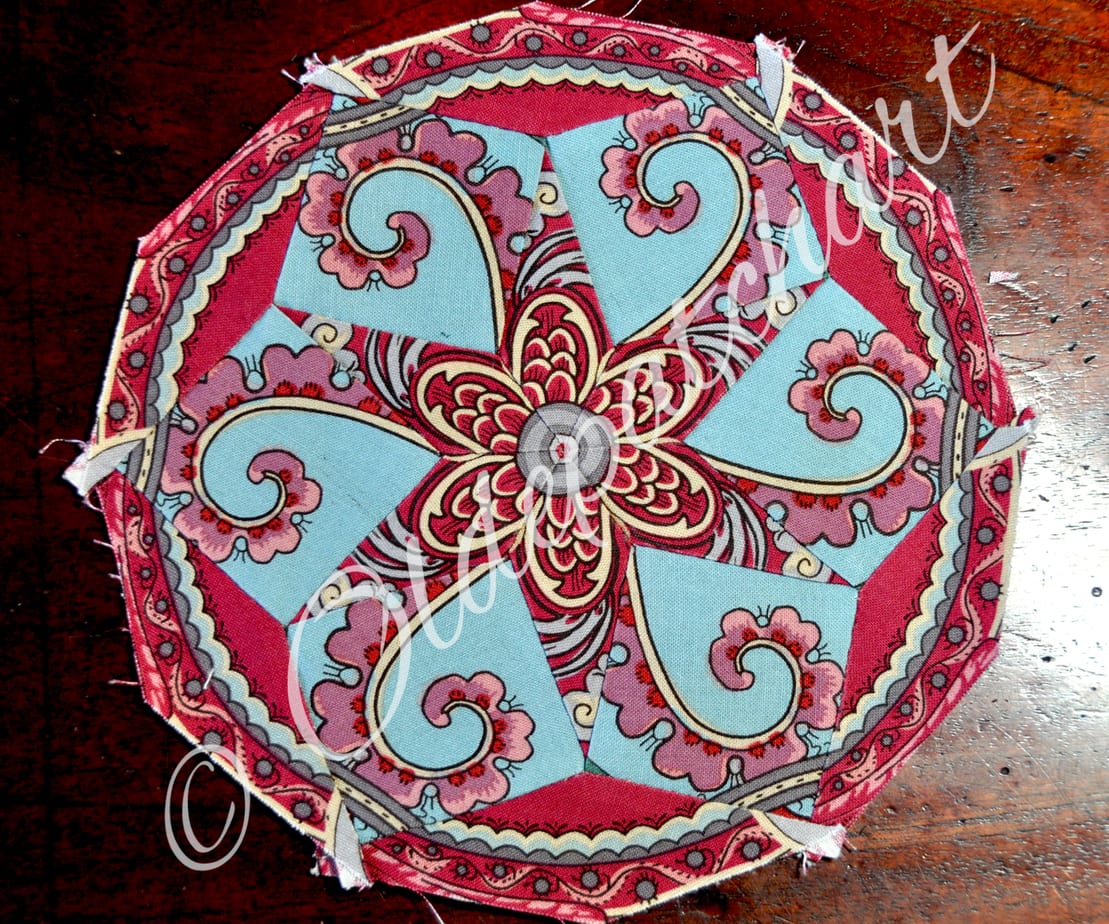
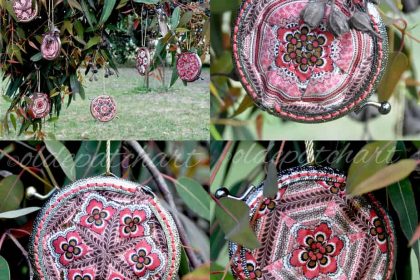
Even MORE Fussy Cutting 101- Oldepatchart Style
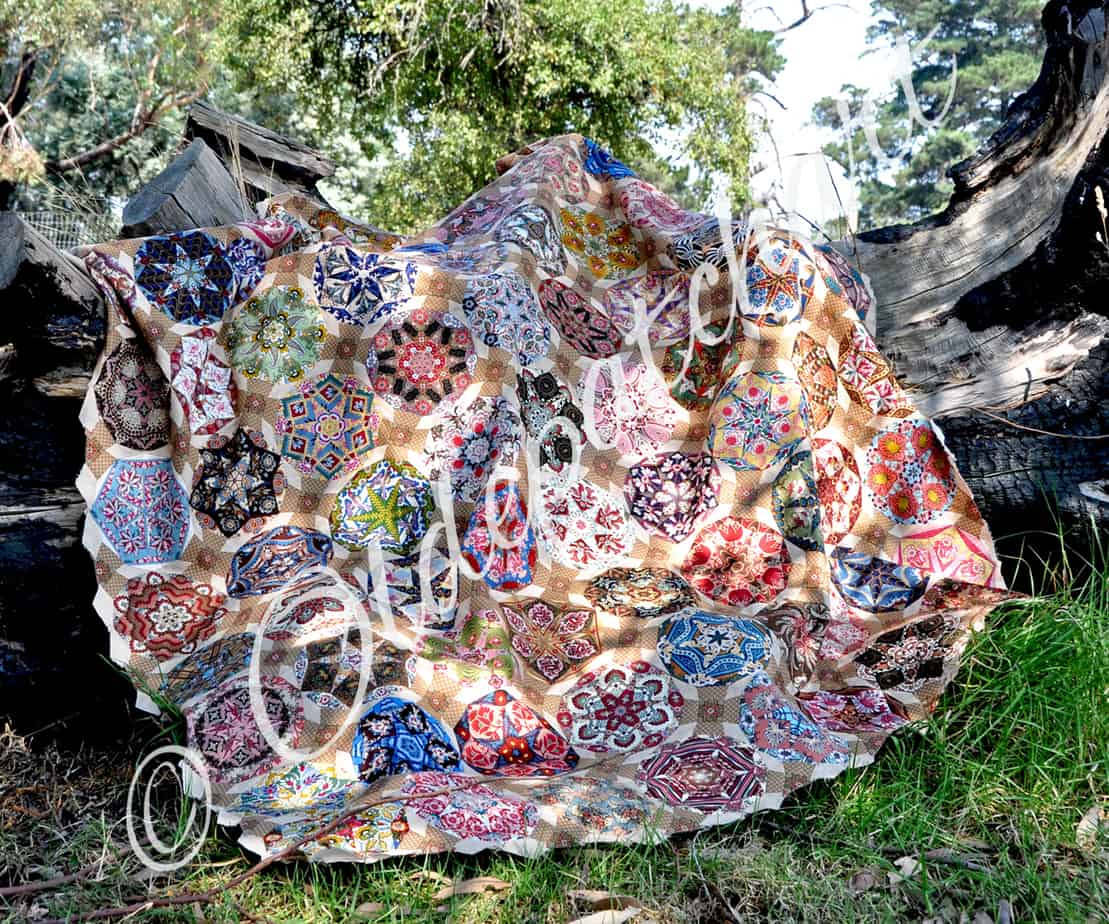
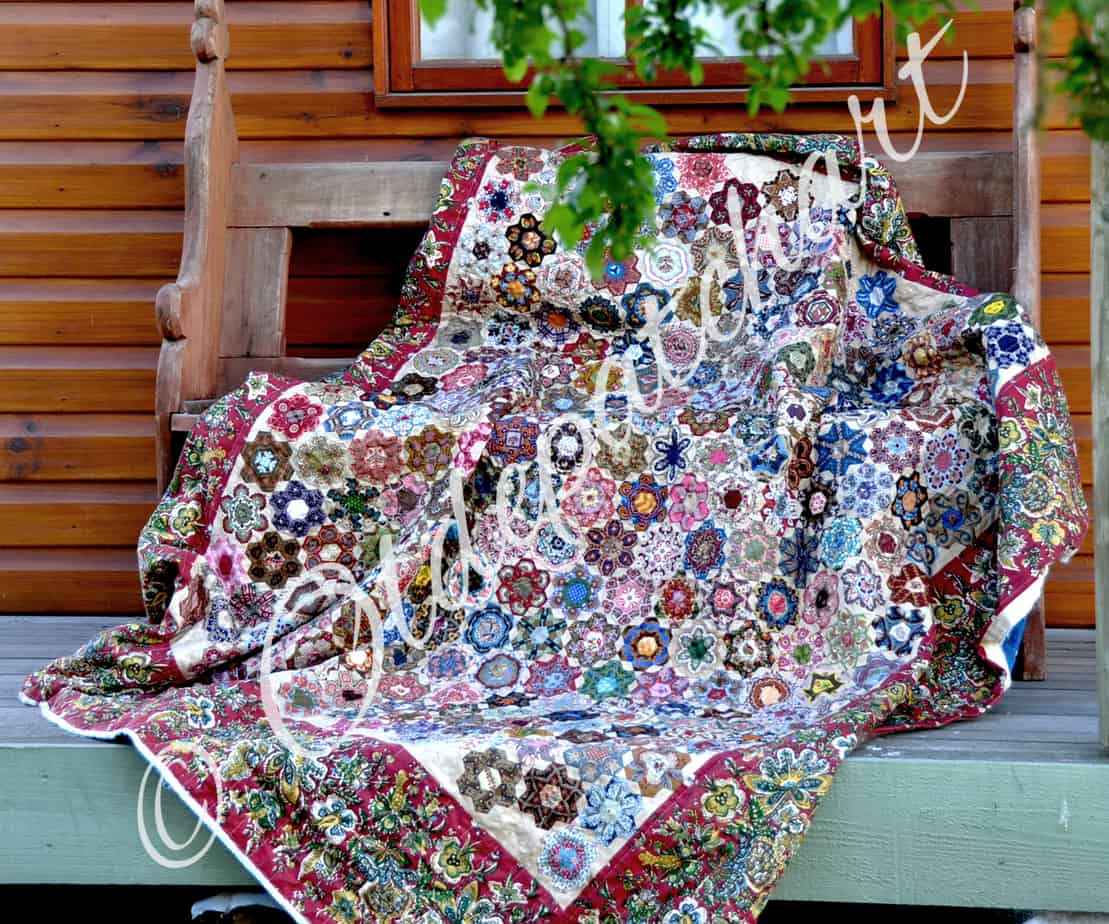
Some more fussy cutting goodness!
In Summary
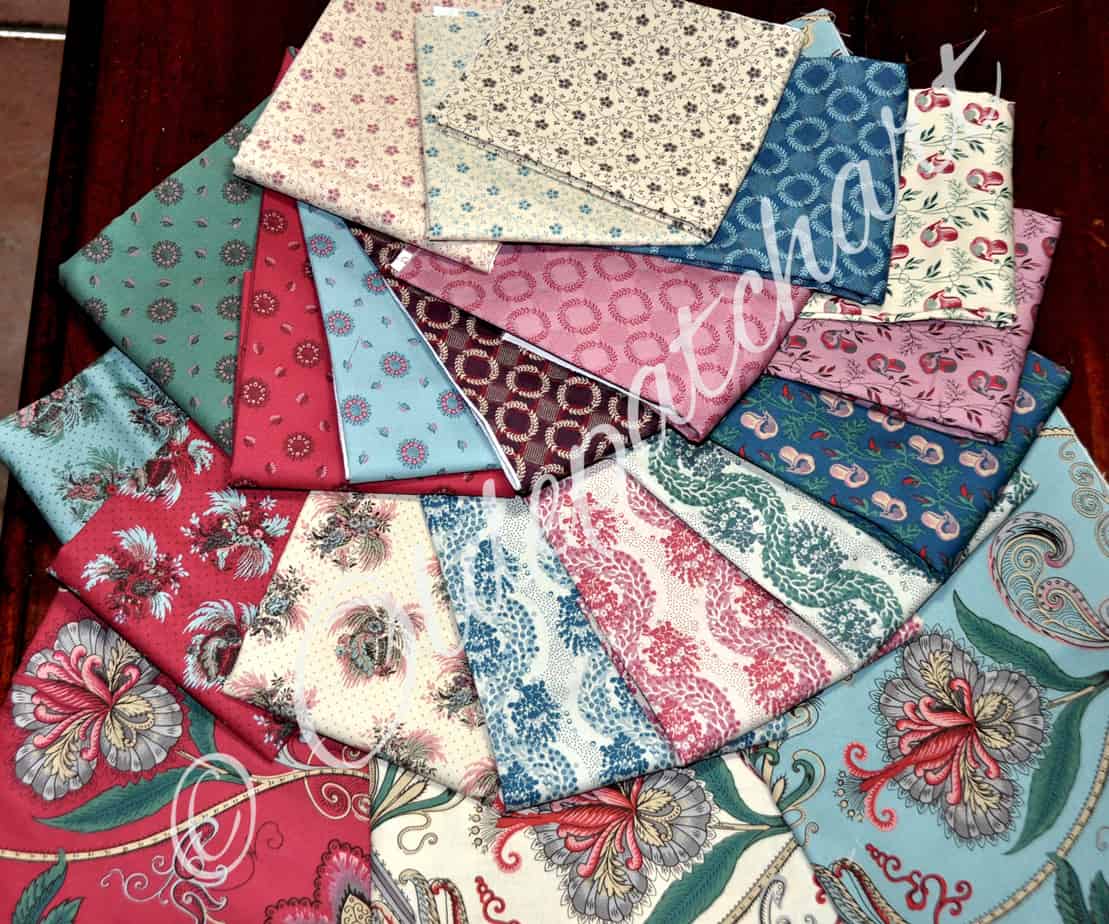
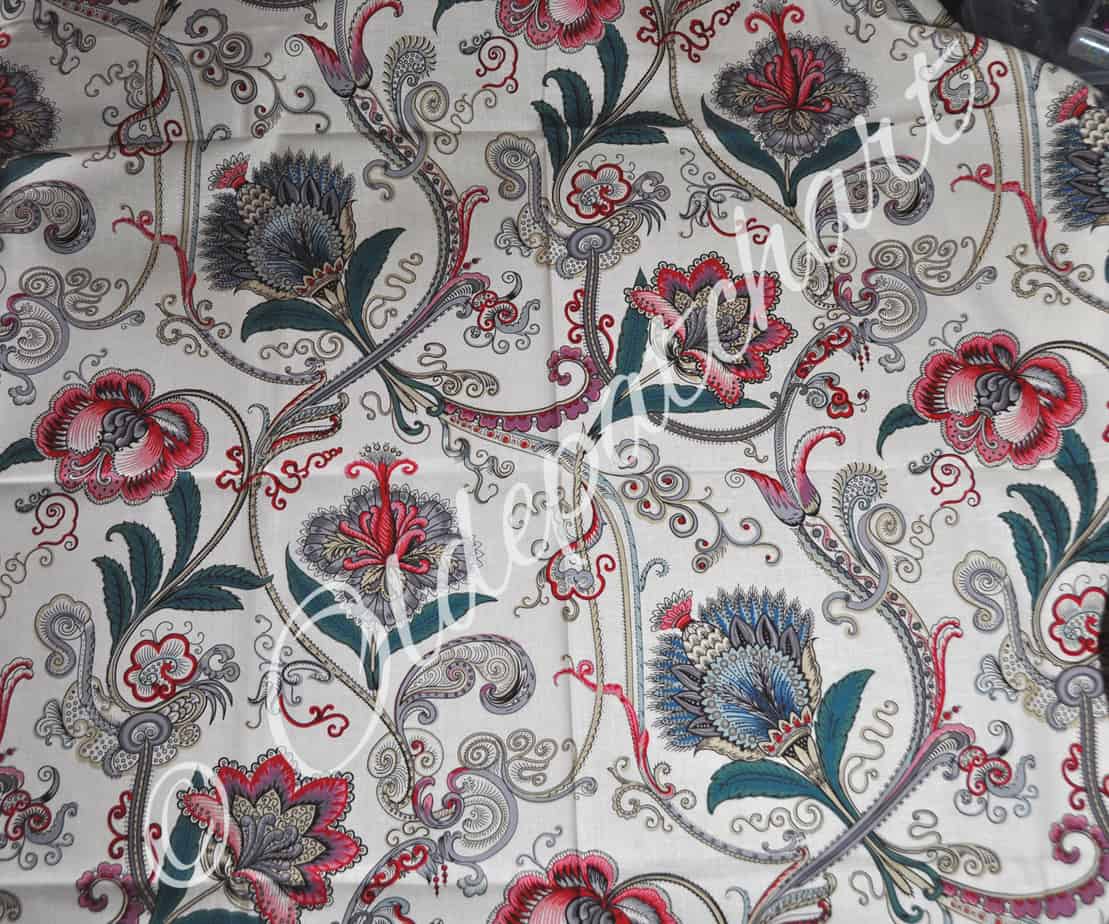

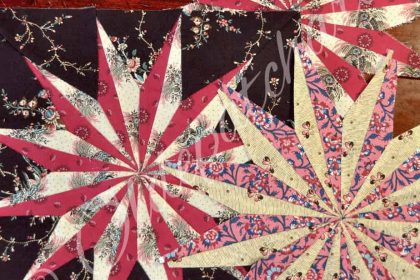
Fabric choice is EVERYTHING when it comes to successful fussy cutting....well that and accuracy!
Keep an eye out when shopping for eye catching, bold patterns.....small designs don't work very well unless you are making tiny ⅜ths inch hexies.
The gorgeous fabric I am using in this project is a new range 'Charlotte' by the very talented designer Michelle Yeo.
It is available direct from Michelle Yeo .....otherwise both Gippsbeary Cottage and Tamborine to Tilba carry the range also.
The pattern I am using is 'Starmania' - 7.5 inch block.....templates and papers are available on my website: Oldepatchart Patterns
or alternatively you can also purchase them via my Etsy store: Oldepatchart Etsy
Please feel free to ask me any questions.....I am more than happy to help wherever I can.
Meanwhile I would love you to follow me on instagram - Oldepatchart
Thank you for a well written tutorial, I’ve changed my attitude to fussy cutting. You have made it look easy.
Oh Anna…..that gladdens my fussy cutting heart……I think there’s always sooooo much mystery surrounding fussy cutting but at the end of the day: just have fun and play with your fabrics. You can’t go wrong. Thanks for your comment.
Brilliant work Paula, love your tutorial….fussy cutting is so much fun
Thanks Lorraine so glad you liked it……and yes as you already know: fussy cutting is life!