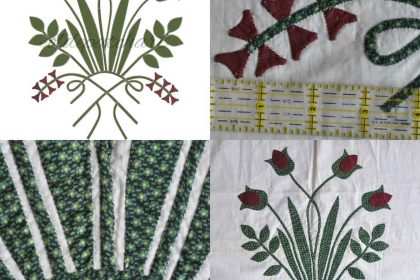
Susie’s Star…..the Centre of our Dutch American Sew Along
Well we are having a heap of fun over on Instagram piecing 'Susie's Star'......a challenging 12 pointed central star for our Dutch American Sew Along: https://www.instagram.com/dutchamericansewalong/
This fun project was started by 3 x friends living in America & The Netherlands that are using antique Dutch quilts as their inspiration:
Susie Wright: fixer_of_old_quilts
Suzanne Groenendaal: suzannevanderschoot
Saskia den Hartog: threads_and_quilts
If you want to come join the fun email Susie and she will send you a pattern & instructions!
susie.fixer.of.old.quilts@gmail.com
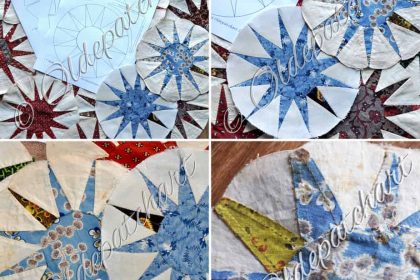
Hmmmmm……..Could I Foundation Piece this Sucker?
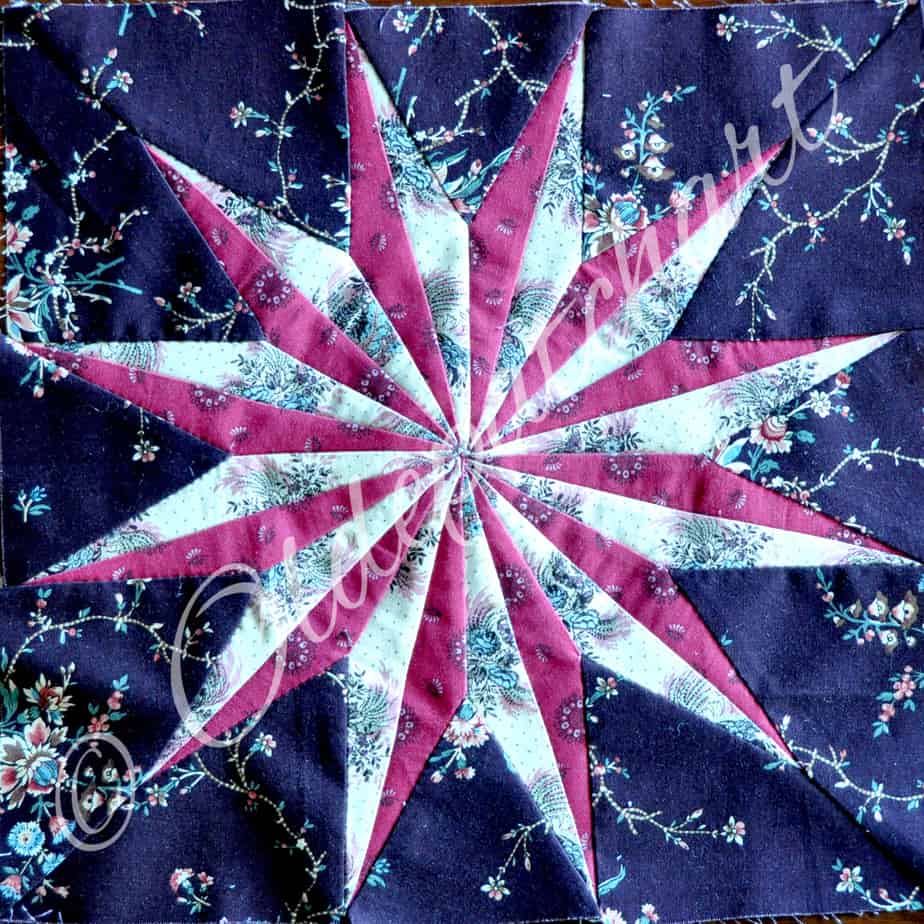
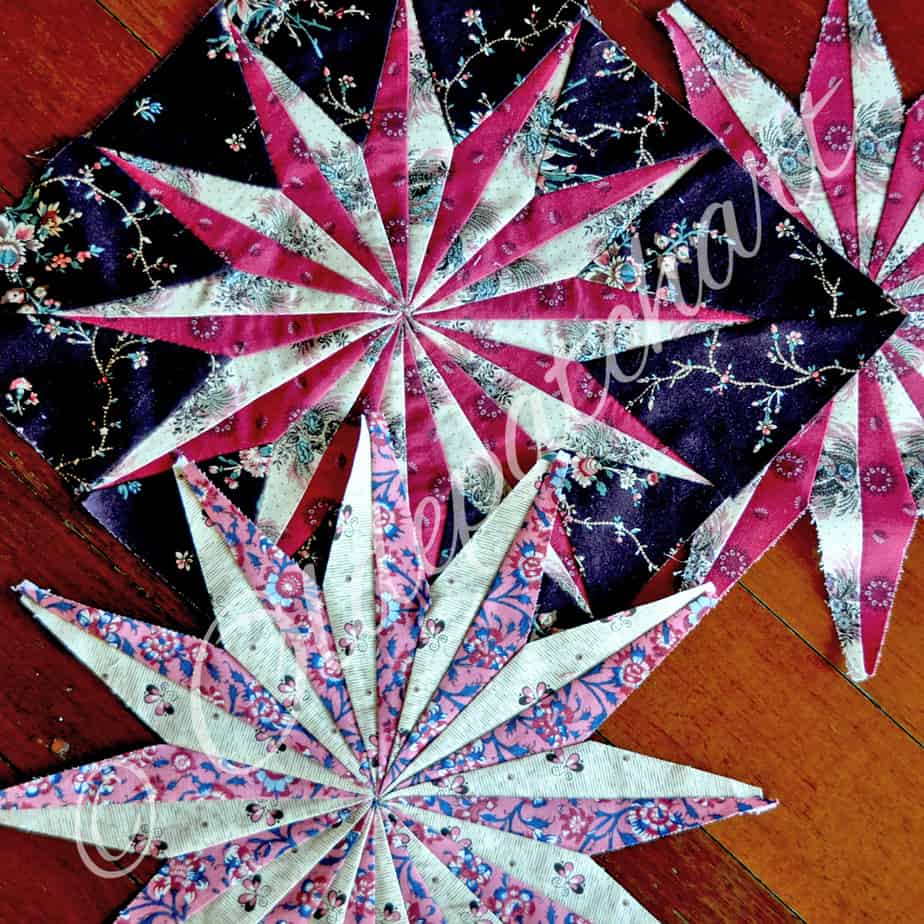
I studied at this star with it's 24 pieces and wondered if it were possible to FPP - Foundation Paper Piece it.......I do like a good challenge lol!
So off I went into my drafting software and drew this sucker up.
My first go at piecing it came out a little wonky in the centre and I quickly worked out why......hence why I would like to share my tips and tricks I learned along the way.
Let me save you that pain!
You also might find my hacks for joining this ridic centre could also work for EPP or hand piecing too?
Here’s my Second Attempt……Much Better!
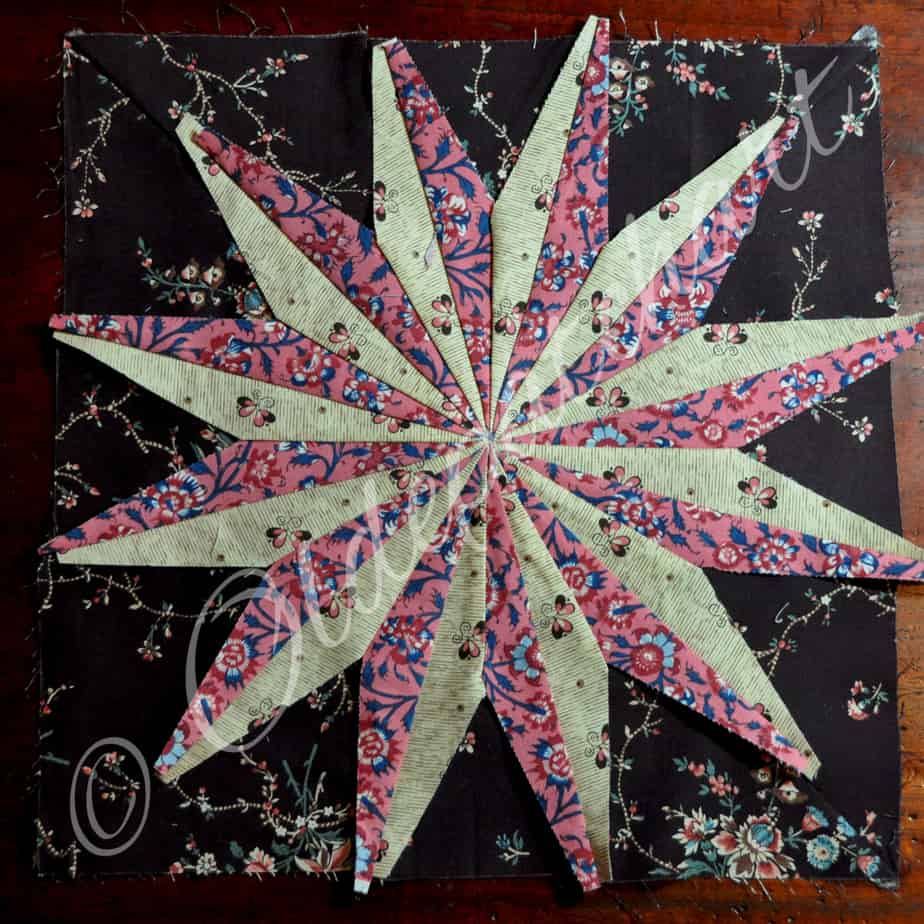
Here's my second attempt....much happier and now without further ado I will share my tips n tricks for conquering that tricky centre!
Start with downloading this FREE PDF - FPP Pattern to Piece Susie's Star which includes both the foundations & template pattern page for the outer set-in shapes.
IMPORTANT: Please read my blog post How to Download & Print a Digital PDF Quilt Pattern BEFORE printing off your pattern. Printing directly from a link usually alters the formatting and size of your pattern!
You will require Susie's piecing diagrams as well.......see email address as above.
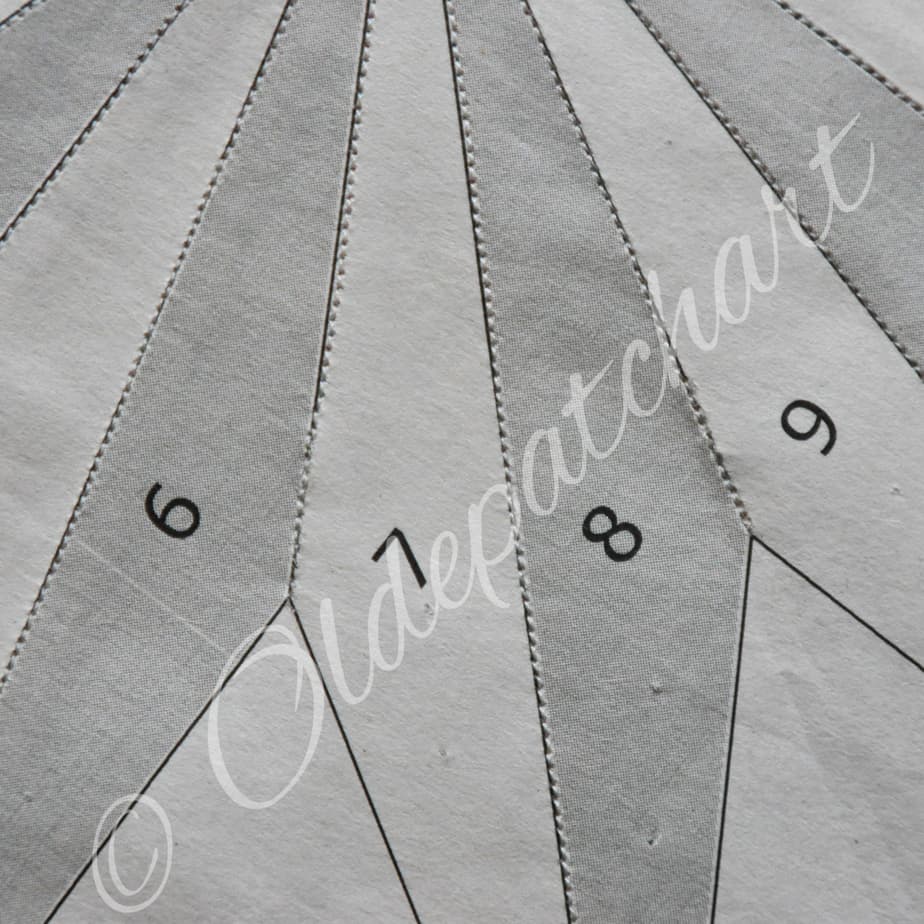
Cut your fabric strips with plenty of fudge factor.....I used 2" wide strips cut into 7" long segments.
You could go less.....but at your own peril lol! Set your machine up with a tiny stitch.....I use 1.5 on my machine.
As with all FPP, start with piece #1 to keep your seams rotating in the same direction: (ask me how I know this....groan!) Also take notice that you are alternating your darks and lights in order as marked.
If you haven't done much foundation paper piecing there's some really good videos online.
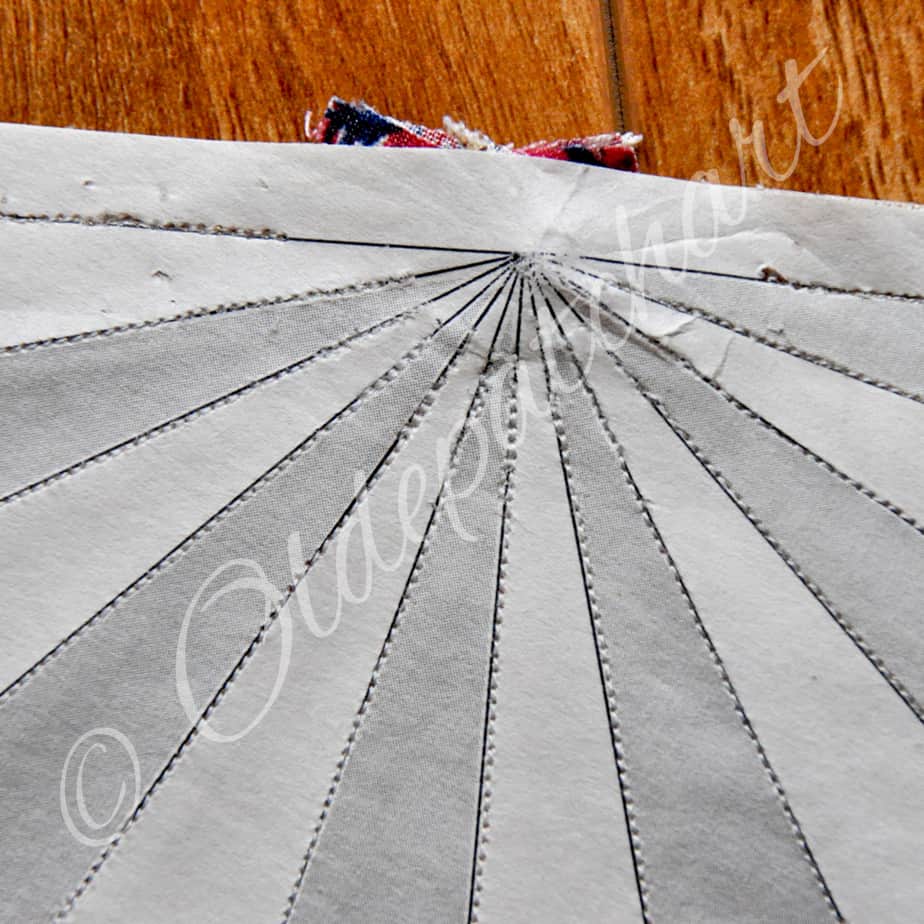
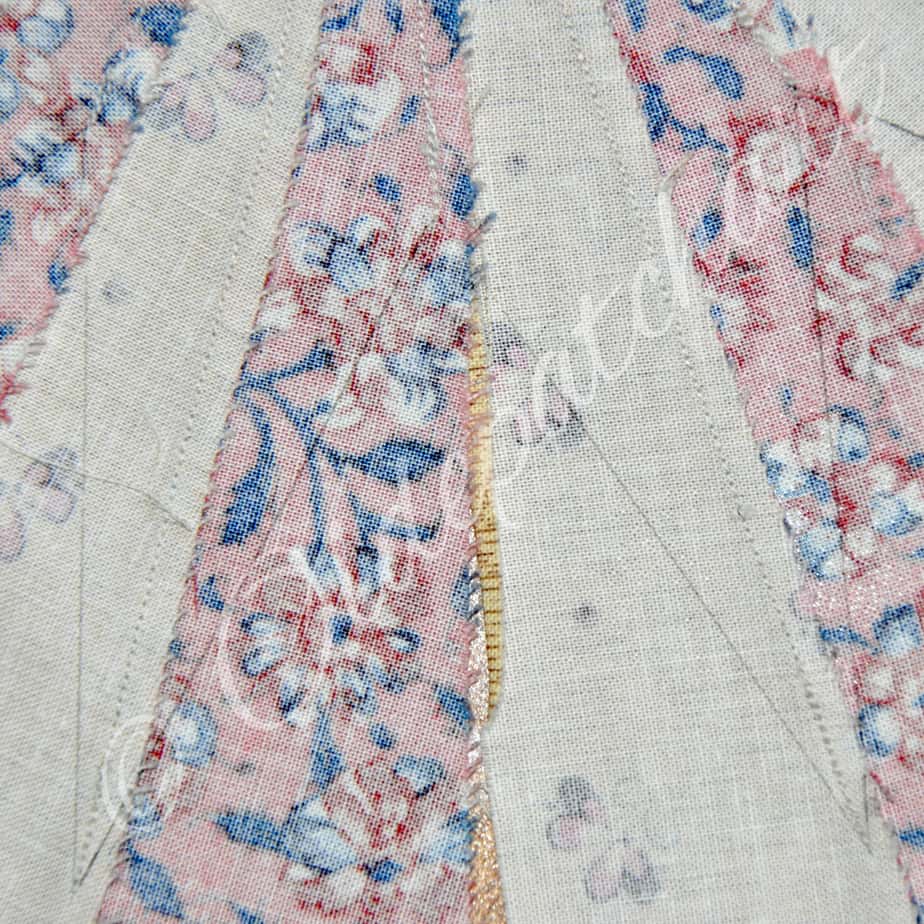
Tip #1: Don’t Sew all the Way Up to the Centre Point
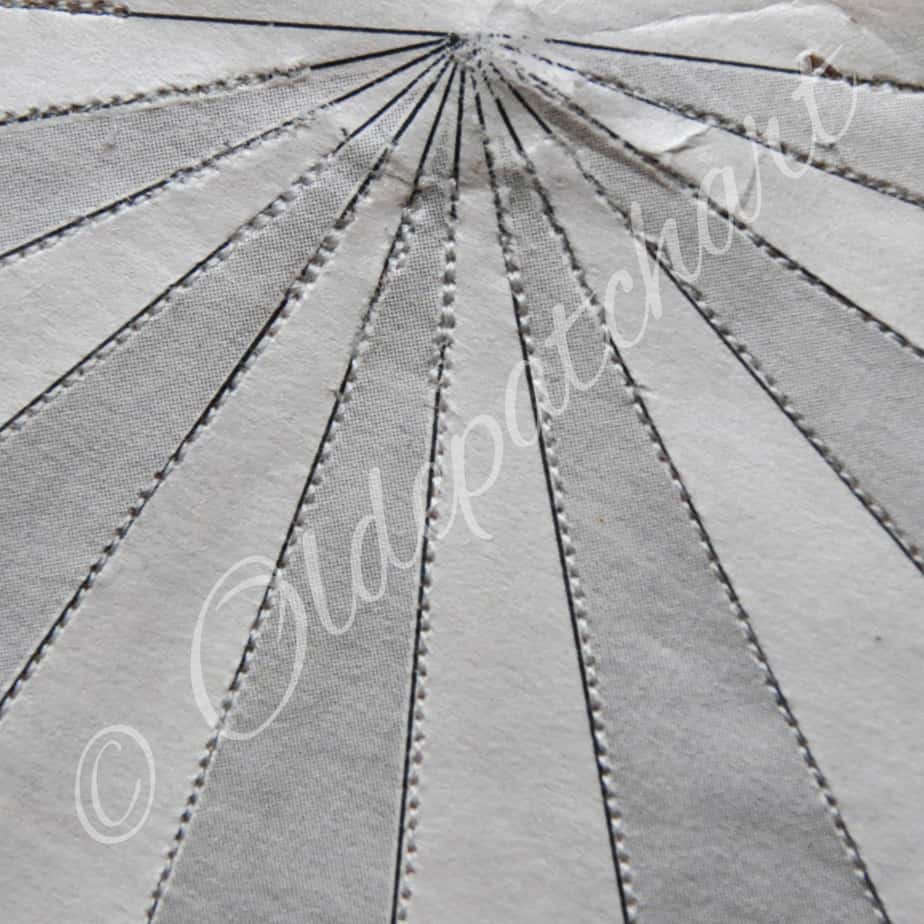
Because we have 24 seams all converging at that one point....or 12 on each half.....DON'T sew right up to the point: the bulk is crazy - your machine & needle won't thank you for it.
I quickly worked out you will need to start a quarter of an inch short of that central point.....stress less we will be hand stitching that centre up later - tighter than a nun's ummmmmm......nightie!
I don't have a reliable back stitch so I just turned my work and sewed back over my line of stitches with my stitch length set at 1.5.
Tip #2: Don’t Sew Into Your Seam Allowances.
Yep same goes for the other end of your seams......at the star points and inner star corners......later we will be using set-in seams and only want to sew exactly to the point where those lines meet.....this will avoid going into the seam allowance.
Once again I turned my work in the machine and sewed back along my line of stitching.
Tip #3: Joining Our Two Halves
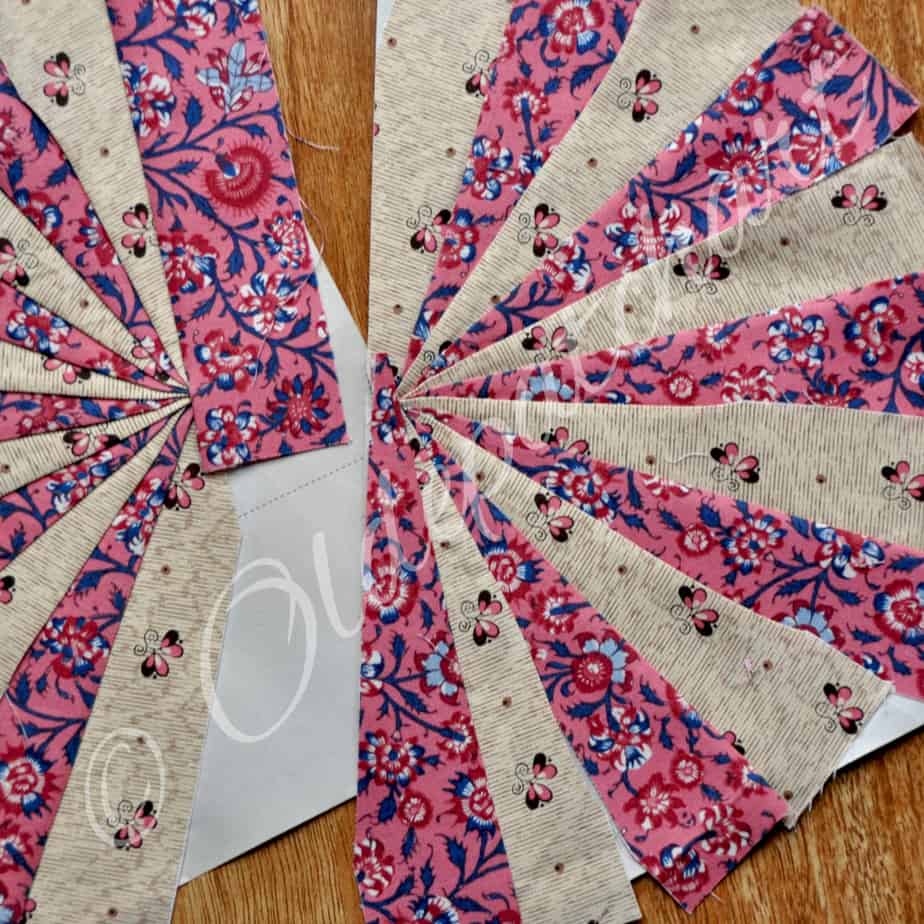
If all has gone well then you should have two halves that match......(ask me how I know that isn't always the case.....groan again!)
Noticed I have now numbered and coloured the foundations....let me save you that pain.
Trim back the centre seams of both pieces adding on a quarter inch seam allowance & place the two halves right sides together.
Place pins perpendicularly through the two centres and at each of the two outer corners.....I place pins all along to make sure the seamlines are matching on both the front & the back.
Then carefully pin the sections together without them shifting.
One tip I learned if you are unsure that your two halves are lined up perfectly is to set your stitch length to 4.0......run that line of stitching and if it's all good - resew with your stitch length reset to 1.5.
At least if it's a little wonky you can easily unpick those longer stitches and rematch the halves!
Tip #4: Joining Our Two Halves Continued.
Here's the thing.
Don't machine stitch through the centre....we will be joining that by hand after our centre is hand sewn.
I stopped a good inch either side of my centre.
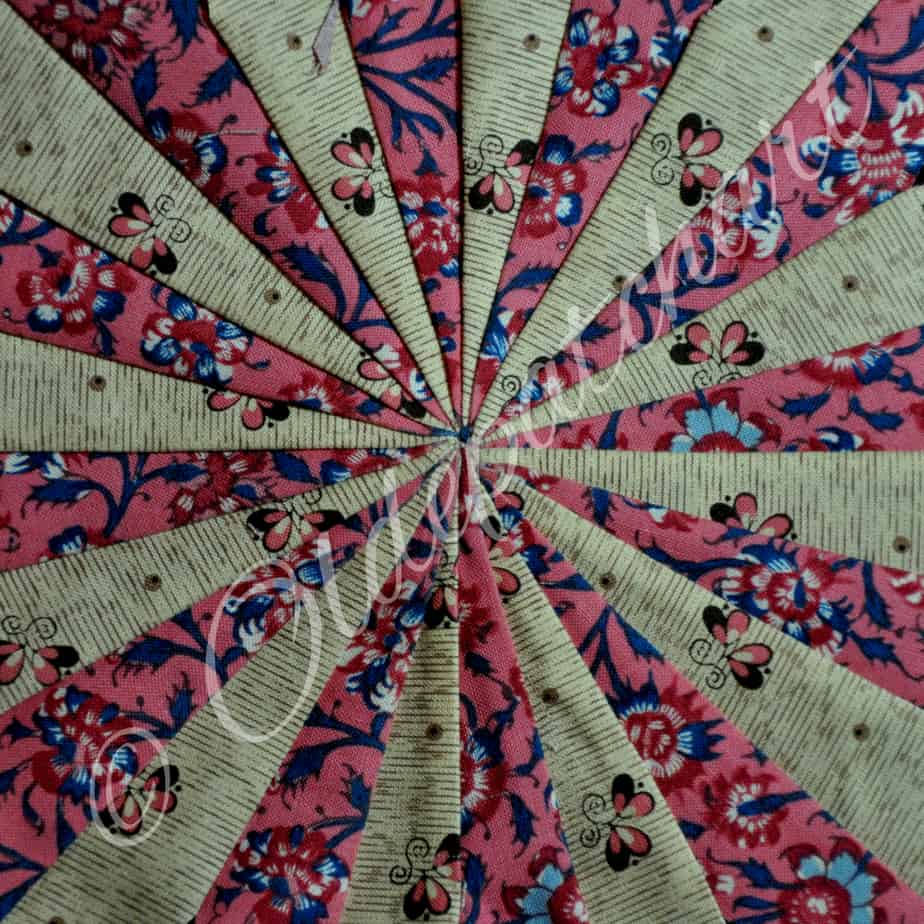
Turn it over and admire your work so far.....we are almost there!
Remove your papers at this point.
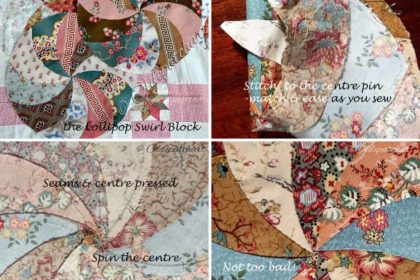
Tip #5: Sewing up Your Centre…..We Are Almost There!
I don't have a photo of me doing this but essentially I found it easier to work from the front.....that way you can SEE your points and simply slip your needle into each one in turn.
I went clockwise using a double thread and then pulled her up nice and tight once I was happy with the alignment.
Having left that quarter inch free allowed me to stitch this up without all the bulk.....it was a tip I was reminded of after reading one of Christine Kirkhofer's needlethimbleandthread informative posts https://www.instagram.com/p/BtM40WYHPLc/
Once you are happy with your centre, then finish your stitching of the seam on either side by hand.
Spin your neat, pretty centre and press, press, press.....steam helps here.
Note you shouldn't need to use a hammer lol!
Tip #6: Mark Your Seam Lines on the Back of Your Block
Turn over your finished piece, using a ruler and fine pen carefully match up the end points of your seams and mark your stitching lines as shown in this diagram.
Next cut a quarter inch to the OUTSIDE of those stitching lines....oh please don't slip, maybe use scissors.
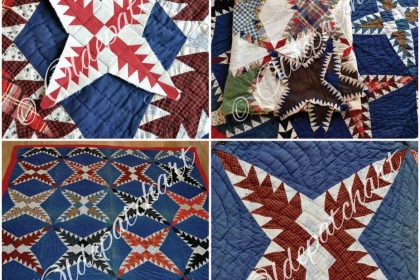
Yay....you have a star!!!!!!
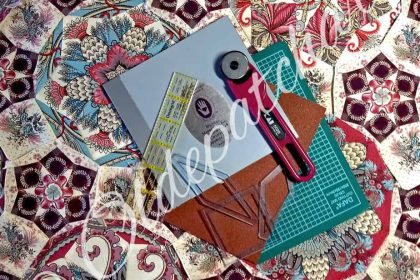
Tip #7: Oversize the Outer Edges of your Background Shapes.
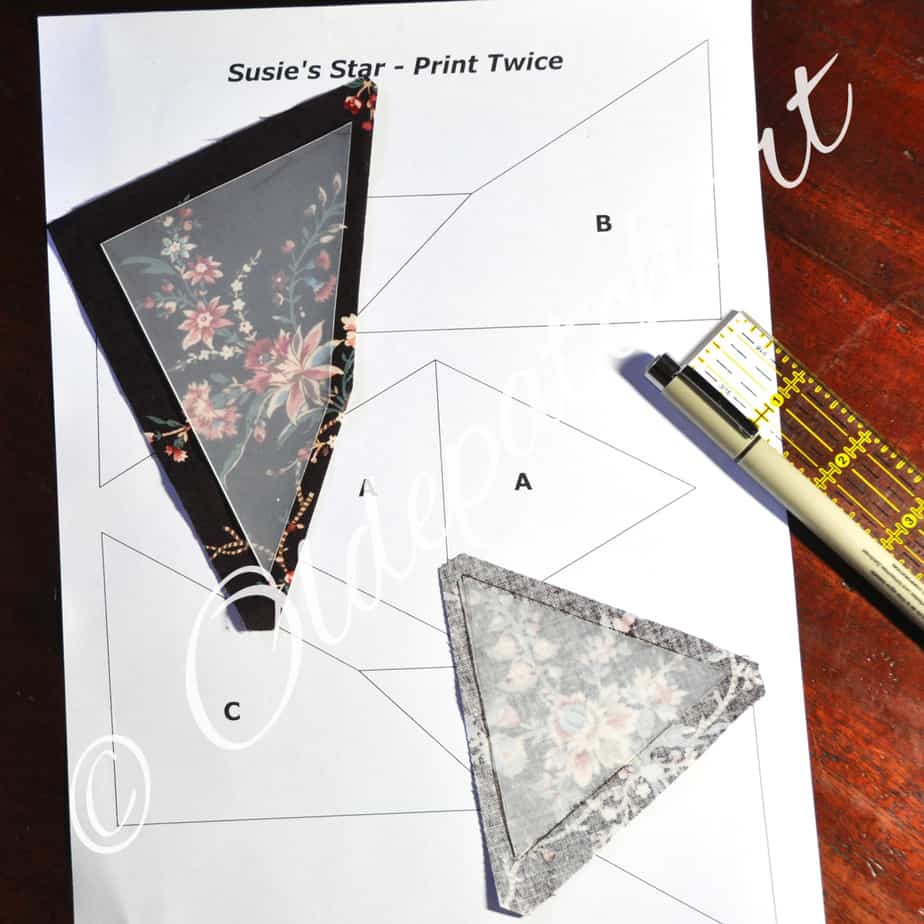
Use the second sheet of your PDF to make your templates. (Shapes A, B & C).
This is the finished size for your background/ fill in shapes that will surround your star.
Mark your stitching line around each template onto the reverse side of your fabric.
Then cut a generous seam allowance on what will be the outside edges of your finished block.
This will allow you to resize the block to 12" finished size.
Please note: I have now added arrows that show which way to set the shapes into your star corners.
thanks for sharing these templates Paula, I’ll give it a go in a little while, once my hand is healed. I had planned to do it, using EPP after strip piecing the light and darks together.
Thanks for your comment Sheila……I really hope the hand heals very soon so you can be back to stitching asap. Maybe foundation piecing this block will be easier on your hand than EPP…..let me know how you go. Best regards: Paula